こんにちは、クラウド事業部 CI/CDサービスメニューチームの島田です。
以前CICDの入門サンプルとしてS3へのデプロイをCodeCommit、CodePipelineを使って実施する方法をご紹介しました。
techblog.ap-com.co.jp
また、一部をCloudformationで展開する方法も紹介しました。
techblog.ap-com.co.jp
今回はCodepipelineも含めて作成できるようCloudformationテンプレートを作成したので記事に残しておきます。
やりたいこと
- CodeCommit上のコードを更新すると、S3上のファイルを更新するパイプラインをCodePipelineで作成
- CICDを試すにあたり、環境をCloudformationを利用して作成
- gitコマンド関連は手動で実施
前提
- ユーザーはCloudformationやCloudformationで作成するリソースを扱う権限を持っていること
- VPCは事前に作成済み
- 作成したVPCにパブリックサブネットがある
- キーペアは事前に作成済み
- 操作環境からSSHアクセスを許可するセキュリティグループを作成済み
- 操作環境はTeraterm等を利用してEC2にログインできる環境
- CodeCommit作成時に初期配置しておくファイル用のS3バケットを準備できる
作成イメージ図
作成環境は簡単に下記イメージです。(Application Composerより)
Codepipelineでレポジトリからデプロイ先を紐づけし、CodeCommitの変更をEventBridgeでトリガーとしてCodepipelineを起動します。
S3CodePipelineArtifactStoreはCodepipelineが動作するときのファイル置き場です。
S3がデプロイ先S3になります。
Ec2はCodeCommitへコードをプッシュ/コミットするための環境になります。

実施事項
CodeCommit初期配置ファイル用S3の作成
任意の名前でS3バケットを作成します。特に設定などは不要です。
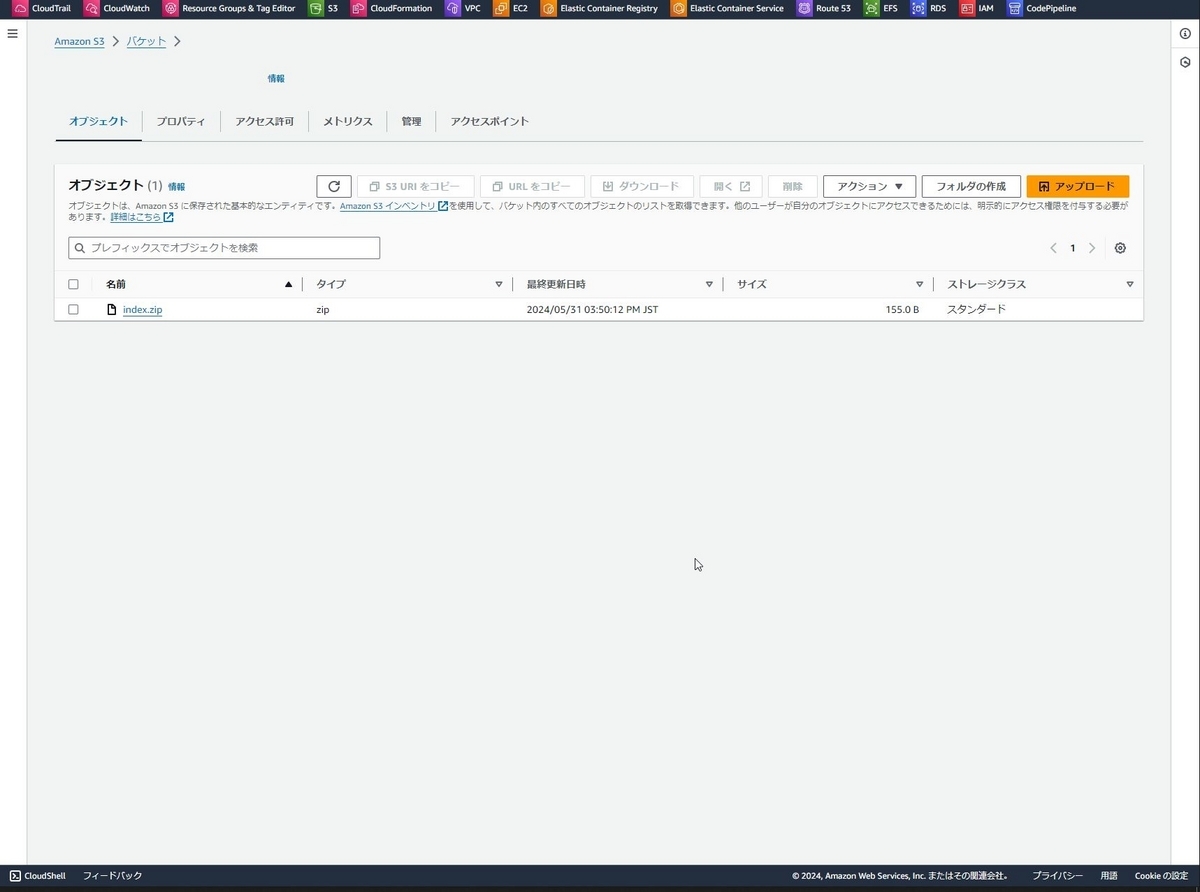
作成したS3バケットの中にCodeCommit作成時に初期配置するファイルをZIPに固めたファイルを格納します。(ファイル名はindex.zip)
このS3バケットの名前は後でCloudformationのインプットに使うため控えておきます。

ZIPファイルの中身はindex.htmlとし、index.htmlの中身は以下としました。
<html><body><h1>It works!</h1></body></html>
Cloudformationスタックの作成
メモ帳を開き、以下内容をtest_codepipeline.yamll等の名前で保存します。
AWSTemplateFormatVersion: "2010-09-09"
Description: "test codecommit pipeline"
Parameters:
  SamplecodeS3Name:
    Type: String
  PublicSubnetId:
    Type: String
  KeyPair:
    Type: AWS::EC2::KeyPair::KeyName
  SecurityGroup:
    Type: AWS::EC2::SecurityGroup::Id
  IpAdress:
    Type: String
    AllowedPattern: (\d{1,3})\.(\d{1,3})\.(\d{1,3})\.(\d{1,3})/(\d{1,2})

Resources:
  Ec2Role:
    Type: AWS::IAM::Role
    Properties:
      RoleName: !Sub ec2role-${AWS::StackName}
      ManagedPolicyArns:
        - arn:aws:iam::aws:policy/AWSCodeCommitFullAccess
      AssumeRolePolicyDocument:
        Version: "2012-10-17"
        Statement:
          - Effect: "Allow"
            Principal:
              Service:
                - "ec2.amazonaws.com"
            Action:
              - "sts:AssumeRole"

  InstanceProfile:
    Type: AWS::IAM::InstanceProfile
    Properties:
      Path: "/"
      Roles:
        - !Ref Ec2Role

  Ec2:
    Type: AWS::EC2::Instance
    Properties:
      ImageId: ami-0c1de55b79f5aff9b
      KeyName: !Ref KeyPair
      InstanceType: t2.micro
      NetworkInterfaces:
        - AssociatePublicIpAddress: "true"
          DeviceIndex: "0"
          SubnetId: !Ref PublicSubnetId
          GroupSet:
            - !Ref SecurityGroup
      IamInstanceProfile: !Ref InstanceProfile
      Tags:
        - Key: Name
          Value: !Sub ec2-${AWS::StackName}

  CodeCommit:
    Type: AWS::CodeCommit::Repository
    Properties:
      RepositoryName: !Sub CodeCommit-${AWS::StackName}
      RepositoryDescription: Test Repository
      Code:
        BranchName: master
        S3:
          Bucket: !Ref SamplecodeS3Name
          Key: index.zip
  S3:
    Type: AWS::S3::Bucket
    DeletionPolicy: Retain
    Properties:
      BucketName: !Join ['-', [!Sub 's3-${AWS::StackName}', !Select [0, !Split ['-', !Select [2, !Split ['/', !Ref 'AWS::StackId' ]]]]]]
      WebsiteConfiguration :
        ErrorDocument : index.html
        IndexDocument: index.html

  S3CodePipelineArtifactStore:
    Type: AWS::S3::Bucket
    DeletionPolicy: Retain
    Properties:
      BucketName: !Join ['-', [!Sub 's3-codepipelineartifactstore-${AWS::StackName}', !Select [0, !Split ['-', !Select [2, !Split ['/', !Ref 'AWS::StackId' ]]]]]]

  BucketPolicy:
    Type: AWS::S3::BucketPolicy
    Properties:
      Bucket: !Ref S3
      PolicyDocument:
        Version: "2012-10-17"
        Statement:
          - Sid: Allow
            Action: s3:GetObject
            Effect: Allow
            Resource:
              - !Sub arn:aws:s3:::${S3}/*
            Condition:
              IpAddress:
                aws:SourceIp: !Ref IpAdress
            Principal: "*"
          - Sid: Deny
            Action: s3:GetObject
            Effect: Deny
            Resource:
              - !Sub arn:aws:s3:::${S3}/*
            Condition:
              NotIpAddress:
                aws:SourceIp: !Ref IpAdress
            Principal: "*"

  IAMPolicyCodePipeline:
    Type: AWS::IAM::ManagedPolicy
    Properties:
      PolicyDocument:
        Version: "2012-10-17"
        Statement:
          - Effect: Allow
            Action:
              - "codecommit:CancelUploadArchive"
              - "codecommit:GetBranch"
              - "codecommit:GetCommit"
              - "codecommit:GetRepository"
              - "codecommit:GetUploadArchiveStatus"
              - "codecommit:UploadArchive"
            Resource:
              - "*"
          - Effect: Allow
            Action:
              - "s3:*"
            Resource:
              - "*"
      ManagedPolicyName: !Sub iam-policy-codepipeline-${AWS::StackName}

  IAMRoleCodePipeline:
    Type: AWS::IAM::Role
    Properties:
      AssumeRolePolicyDocument:
        Version: "2012-10-17"
        Statement:
          - Effect: Allow
            Principal:
              Service:
                - codepipeline.amazonaws.com
            Action:
              - 'sts:AssumeRole'
      ManagedPolicyArns:
        - !Ref IAMPolicyCodePipeline
      RoleName: !Sub iam-role-codepipeline-${AWS::StackName}


  CodePipeline:
    Type: AWS::CodePipeline::Pipeline
    Properties:
      ArtifactStore:
        Location: !Ref S3CodePipelineArtifactStore
        Type: S3
      Name: !Sub CodePipeline-${AWS::StackName}
      RoleArn: !GetAtt IAMRoleCodePipeline.Arn
      PipelineType: V2
      ExecutionMode: QUEUED
      Stages:
        - Actions:
          - ActionTypeId:
              Category: Source
              Owner: AWS
              Provider: CodeCommit
              Version: 1
            Configuration:
              RepositoryName: !Sub CodeCommit-${AWS::StackName}
              BranchName: master
              PollForSourceChanges: false
              OutputArtifactFormat: CODE_ZIP
            Name: Source
            Namespace: SourceVariables
            OutputArtifacts:
              - Name: SourceArtifact
            RunOrder: 1
          Name: Source
        - Actions:
          - ActionTypeId:
              Category: Deploy
              Owner: AWS
              Provider: S3
              Version: 1
            Configuration:
              BucketName: !Ref S3
              Extract: true
            Name: Deploy
            Namespace: DeployVariables
            InputArtifacts:
              - Name: SourceArtifact
            RunOrder: 1
          Name: Deploy

  IAMPolicyEventBridge:
    Type: AWS::IAM::ManagedPolicy
    Properties:
      PolicyDocument:
        Version: "2012-10-17"
        Statement:
          - Effect: Allow
            Action:
              - "codepipeline:StartPipelineExecution"
            Resource:
              - !Join
                - ''
                - - 'arn:aws:codepipeline:ap-northeast-1:'
                  - !Sub '${AWS::AccountId}:'
                  - !Ref CodePipeline
      ManagedPolicyName: !Sub iam-policy-eventbridge-${AWS::StackName}

  IAMRoleEventBridge:
    Type: AWS::IAM::Role
    Properties:
      AssumeRolePolicyDocument:
        Version: "2012-10-17"
        Statement:
          - Effect: Allow
            Principal:
              Service:
                - events.amazonaws.com
            Action:
              - 'sts:AssumeRole'
      ManagedPolicyArns:
        - !Ref IAMPolicyEventBridge
      RoleName: !Sub iam-role-eventbridge-${AWS::StackName}
      Tags:
        - Key: Name
          Value: !Sub iam-role-eventbridge-${AWS::StackName}

  EventBridge:
    Type: AWS::Events::Rule
    Properties:
      Description: !Sub for codepipeline ${AWS::StackName}
      EventPattern:
        source:
          - aws.codecommit
        detail-type:
          - 'CodeCommit Repository State Change'
        resources:
          - !GetAtt CodeCommit.Arn
        detail:
          event:
            - referenceCreated
            - referenceUpdated
          referenceType:
            - branch
          referenceName:
            - master
      Name: !Sub eventbridge-codepipeline-${AWS::StackName}
      State: ENABLED
      Targets:
        - Arn: !Join
            - ''
            - - 'arn:aws:codepipeline:ap-northeast-1:'
              - !Sub '${AWS::AccountId}:'
              - !Ref CodePipeline
          Id: CodePipeline
          RoleArn: !GetAtt IAMRoleEventBridge.Arn

Outputs:
    EC2PublicIp:
        Value: !GetAtt Ec2.PublicIp
    CodeCommitCloneURL:
        Value: !GetAtt CodeCommit.CloneUrlHttp
    S3:
        Value: !Ref S3
    S3CodePipelineArtifactStore:
        Value: !Ref S3CodePipelineArtifactStore
    S3StaticWebsiteHosting:
        Value: !GetAtt S3.WebsiteURL
AWSコンソール上でCloudformation > スタックの作成 >新しいリソースを使用(標準) からスタックを作成します。

既存のテンプレートを選択 > テンプレートファイルのアップロード >ファイルの選択 から先ほど保存したtest_codepipeline.yamlを選択し次へを押下します。

以下を入力し、次へを押下します。
スタック名:任意のものを入力(バケット名にも含まれるため帯大文字は使用しない)
IpAdress:許可したいIPアドレス帯
KeyPair:作成済みの自分が扱えるキーペア
PublicSubnetId:作成済みのパブリックサブネットID
SamplecodeS3Name:CodeCommit初期配置ファイル用S3のバケット名
SecurityGroup:作成済みの操作環境からSSHアクセスを許可したセキュリティグループ

スタックオプションの設定画面では次へ、確認して作成画面では機能欄のチェックボックスを確認して送信を押下します。


スタック作成処理が開始しました。指定したスタック名のスタックがCREATE_COMPLETEの表示になれば作成完了です。自分の環境では3分ほどで展開が完了しました。

出力タブをクリックすると、下記を確認できます。
- EC2PublicIp:作成したEC2にアクセスするためのパブリックIP
- CodeCommitCloneURL:作成したCodeCommitを自分の環境(今回はEC2)にクローンする際の接続情報
- S3:デプロイ先S3。手動削除対象。
- S3CodePipelineArtifactStore:Codepipeline作業S3。手動削除対象。
- S3StaticWebsiteHosting:デプロイ先S3の静的ホスティングサイトのURL

S3StaticWebsiteHostingに出力されたURLにアクセスするとCodeCommit作成時に初期配置する用設定したサイトが表示されます。

EC2でCodeCommit(git)の操作(ファイルの変更)
作成したEC2にログインします。接続先IPは先ほど出力した「EC2PublicIp」で確認できます。
Teraterm等でログイン後、gitをインストールし付与したロールでCodeCommitに接続するために以下コマンドを実行します。
【CodeCommitの作成で控えた接続情報】は先ほど出力した「CodeCommitCloneURL」で確認できます。
$sudo yum install git -y
$ git config --global credential.helper '!aws --region us-east-1 codecommit credential-helper $@'
$ git config --global credential.UseHttpPath true
$ git clone 【CodeCommitの作成で控えた接続情報】
クローンしたレポジトリに移動し、該当ディレクトリ配下index.htmlがあるか確認して、中身の変更します。(例だと!を@に変更)
例
$ cd codecommit-test/
$ pwd
/home/ec2-user/codecommit-test
$ ls
index.html
$ cat index.html
<html><body><h1>It works!</h1></body></html>
$ vi index.html
$ cat index.html
<html><body><h1>It works@</h1></body></html>
以下コマンドでindex.htmlをコミット対象に追加、コミットを実行、CodeCommitにindex.htmlをプッシュします。
$ git add .
$ git commit -m "test commit"
$ git push origin master
Codepipelineの動作確認
AWSコンソール上でCodePipeline > パイプライン から作成したCloudformationのスタック名を含むパイプラインを選択します。いつ動作したかが確認できます。(直近だと「今」表示)

再度、デプロイ先S3の静的ホスティングサイトのURL(S3StaticWebsiteHosting)を確認するとサイトの表示が変わったことを確認できます。

環境の削除
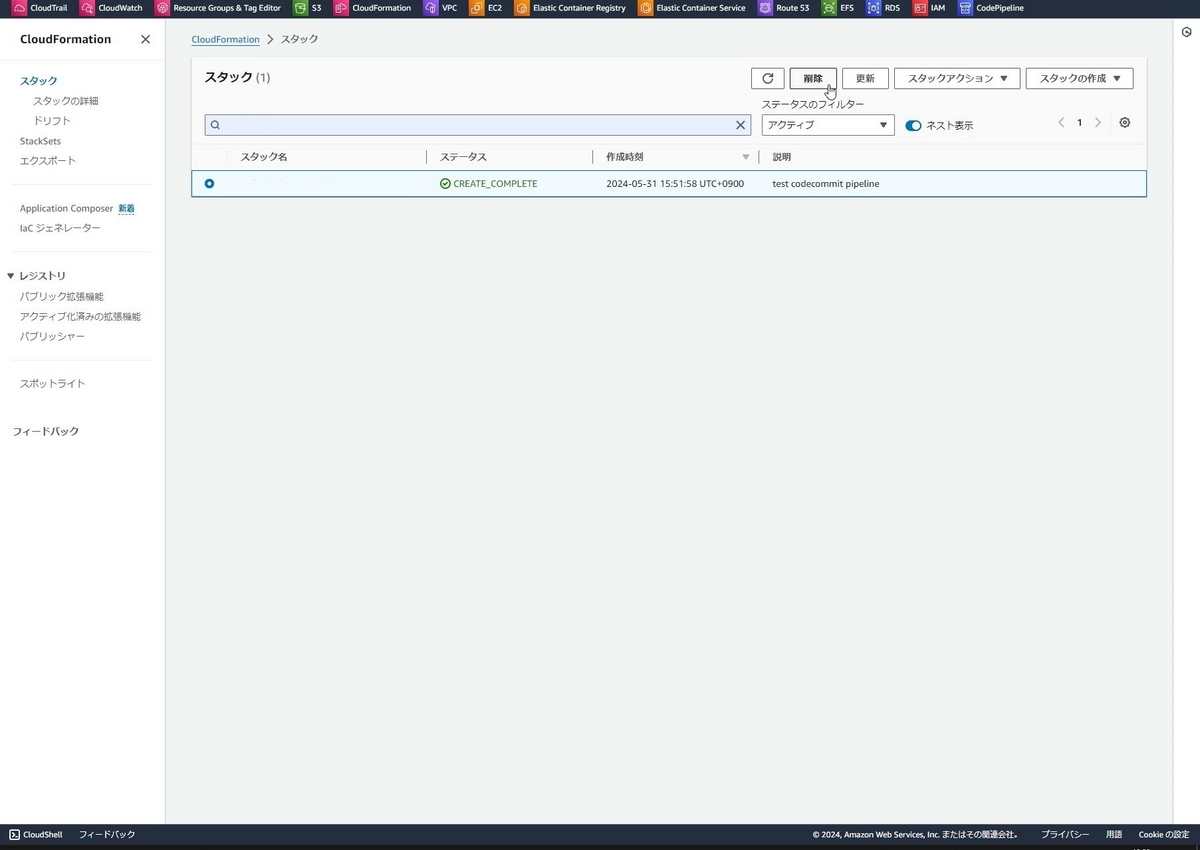
動作確認後、S3とCloudformationのスタックの削除します。
削除対象S3はCloudformationのスタックの出力画面(S3CodePipelineArtifactStore、S3)にバケット名が表示されているため、S3画面から削除してください。※S3内にファイル等が存在するとS3バケットを削除できないため事前にバケットを空にする必要があります。
Cloudformationはスタックの削除からリソースを削除することができます。
※S3バケットが残っていた場合でも削除できてしまうため、スタックの削除のみではなくS3バケットも削除すること。

最後に
ブログで以前紹介した内容を全部Cloudformation化することで試しやすくしました。
Cloudformationを使うと素早く環境を構築できる一方、自動で作成できてしまうと理解がしづらい側面もあります。手動で作成してどういったリソースや設定があるかを理解してから、Cloudformationを使って効率化するのもひとつの手かもしれませんね。
弊社はGitLabオープンパートナー認定を受けております。 また以下のようにCI/CDの導入を支援するサービスも行っているので、何かご相談したいことがあればお気軽にご連絡ください。
www.ap-com.co.jp