
Introduction
This is Abe from the Lakehouse Department of the GLB Division. In this article, we will explain the flow of connecting Databricks Lakehouse Platform to dbt Cloud using Partner Connect and converting data in Databricks on dbt Cloud. By the way, APC has concluded a sales partner agreement with dbt Labs, Inc., and is able to sell dbt and provide installation support.
table of contents
- Introduction
- table of contents
- What is dbt cloud
- Start of Partner Connect
- Project setup on dbt cloud
- Prepare your source data
- Project Structure Setup
- source declaration
- Create a staging model
- Reference article
- Conclusion
What is dbt cloud
dbt cloud is a development environment that can convert data on the cloud using mainly SQL provided by dbt Labs. Since it is in charge of Transform in the ELT (Extract Load Transform) of the data processing flow, it cannot extract or read data, and focuses on converting data read from the database.
With dbt cloud, you can use Databricks Partner Connect to convert data on Databricks on dbt cloud and put the data on Databricks. *To use Partner Connect, you need to use a Premium subscription plan .
(https://www.getdbt.com/partners/databricks/のThe Analytics Engineering Workflowの一部を引用)
Start of Partner Connect
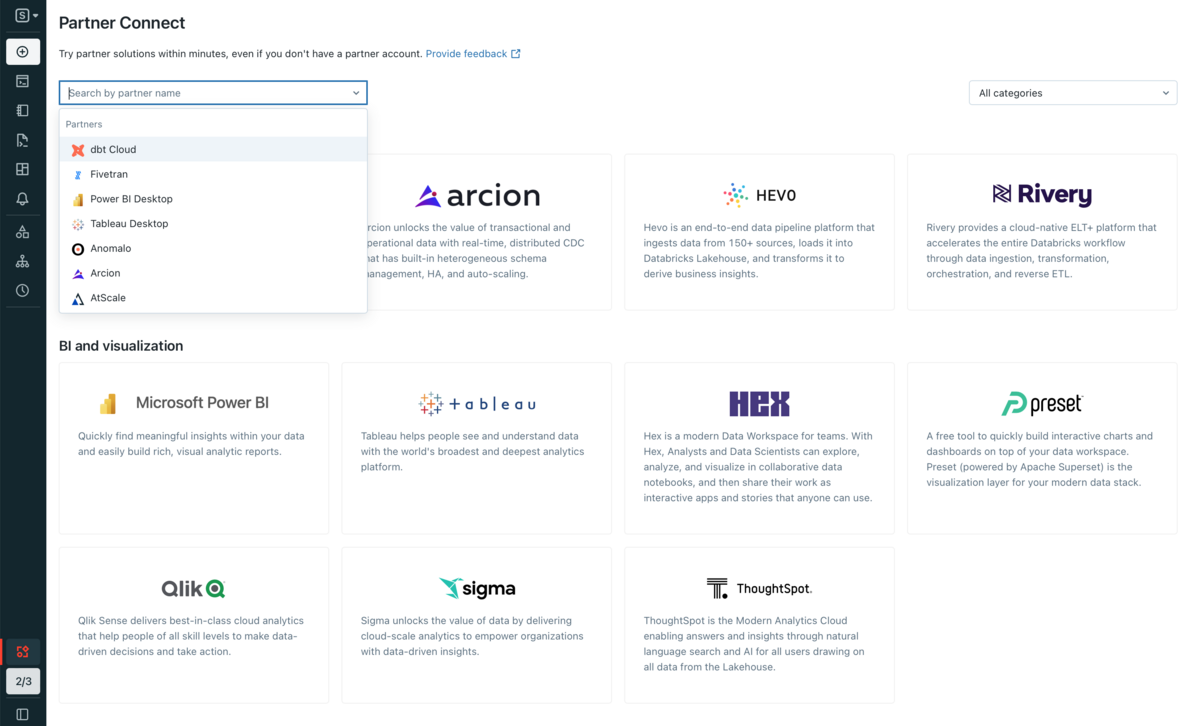
After logging into Databricks, go to your SQL workspace and click Partner Connect in the sidebar. You will be prompted to select a partner to connect to, select from the search field pulldown or scroll down and select dbt.
Select SQL warehouse to use with dbt cloud . (It takes a few minutes to boot)
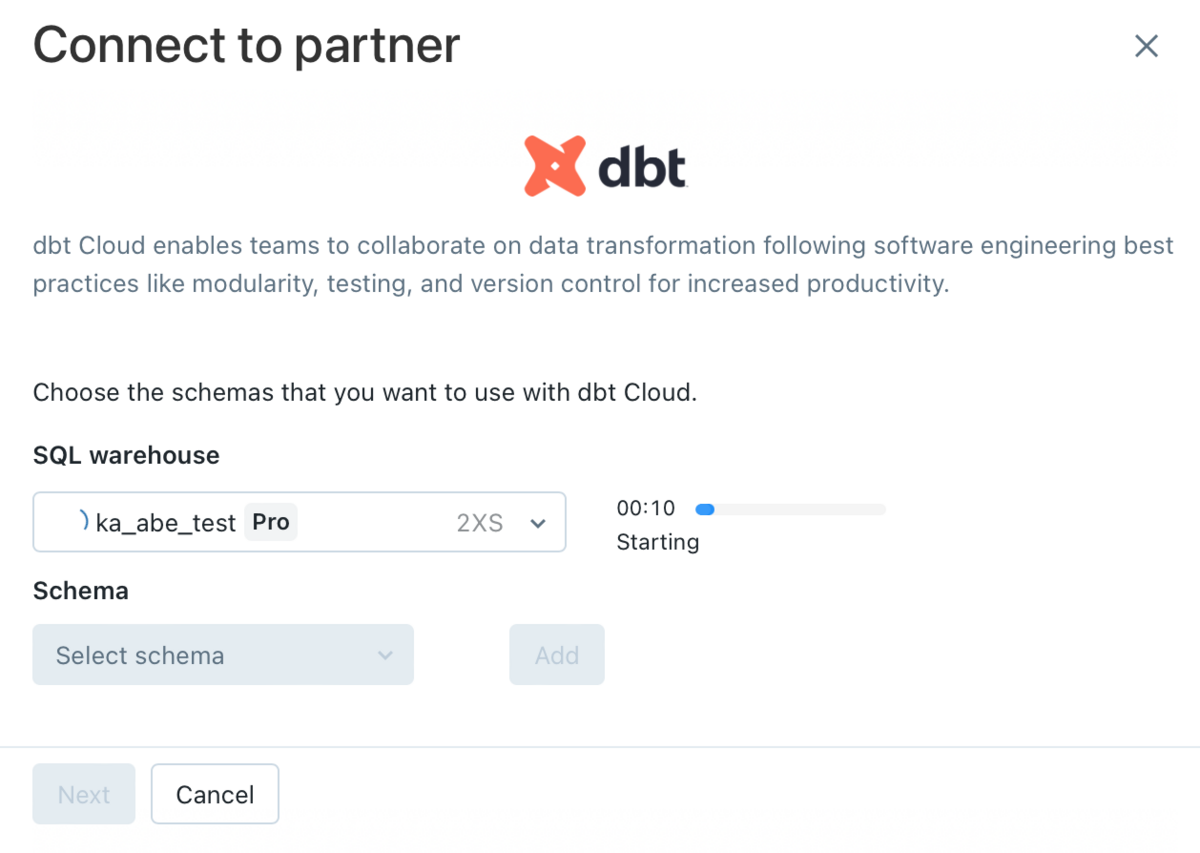
Then select a schema (database) from the Schema drop-down list. You can select multiple schemas and click Add to add more schemas. *When using dbt Partner Connect for the first time, only default will be displayed.
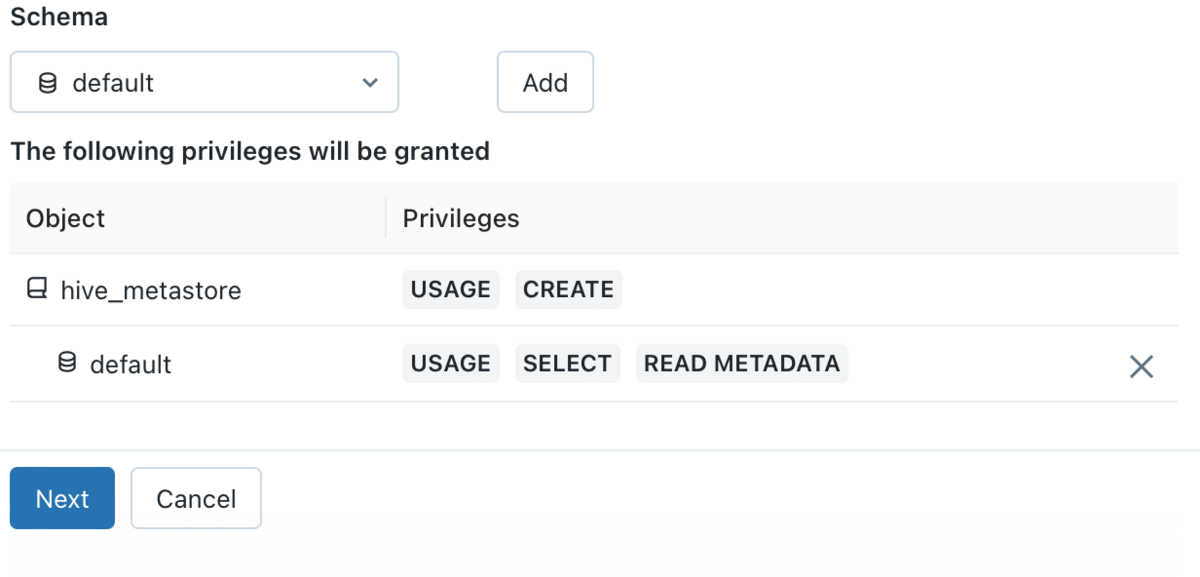
USAGE , SELECT , READ METADATA privileges are granted to the selected schema . After clicking the Next button, you will be presented with your dbt cloud-specific username and selected schema permissions, and a personal access token will be created. Click the Next button.

The email address you use when signing up for dbt Cloud is displayed, but pre-filled with the email address associated with your workspace. Click the Connect to dbt Cloud button to initiate the connection.

Once connected, a new tab of dbt cloud will open. This completes the work of Partner Connect.
Project setup on dbt cloud
Go to the dbt cloud page and set up your project. It is assumed that the project has been created in advance, but if you have not, please start by entering the project name at the project creation stage. First, select Databricks as the connection destination and click the Next button.

Go to Preferences. - Enter the connection name in the Name field. - Select Adapter to connect with Databricks. Two adapters are provided, Databricks (dbt-databricks) is a validated adapter maintained jointly by Databricks and dbt Labs. This adapter is recommended as it has the latest features such as support for Unity Catalog on Databricks.

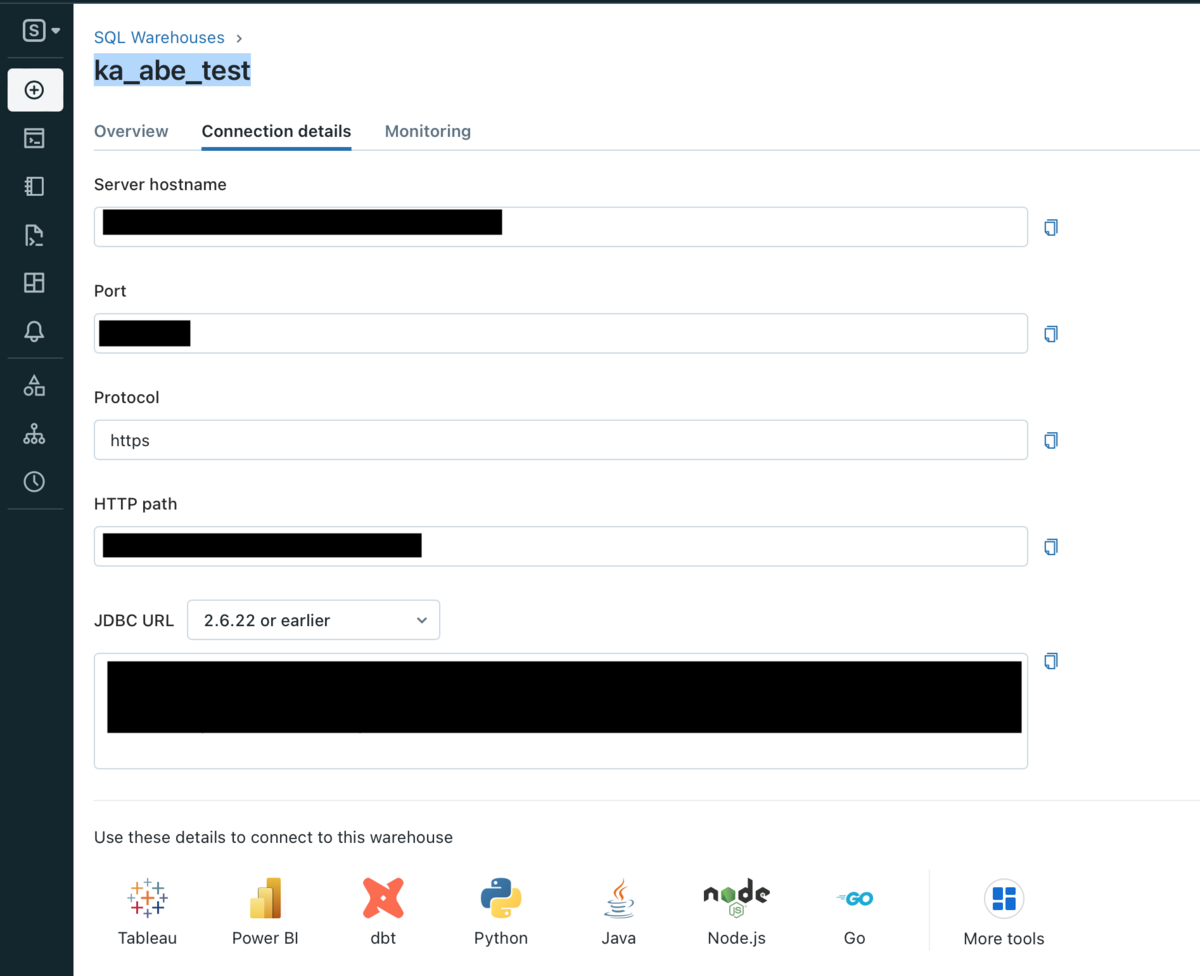
Enter various setting items. First, enter the Databricks SQL Warehouse Server Hostname and HTTP Path.
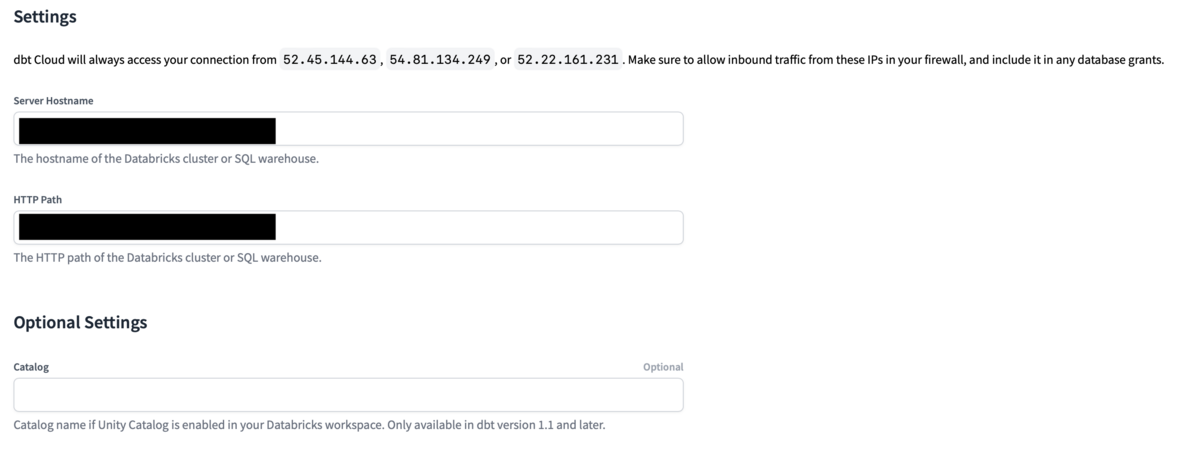
To check the Server Hostname and HTTP Path, click SQL Warehouse from the sidebar, select the SQL Warehouse to connect to, and check the SQL Warehouse information from the Connection details tab.
For Catalog, enter the catalog name if the Unity Catalog is enabled in Databricks Workspace. Since it is optional, there is no problem even if you do not enter it.
Go to authentication settings. Enter the personal access token for your Databricks account in the Token field.

In the Schema field, enter the name of the schema in which the tables and views will be created in dbt Cloud. This schema is also created on Databricks, and the table to be created as a model is also created in the schema, so it seems that the work is synchronized.
Target Name is not well known. Since it is optional, there is no problem if you do not enter it, but I entered it as default.
By the way, tokens are possible from Databricks user settings. Create a token by going to your Databricks user settings and clicking the Generate new token button.

You can comment when creating a token, but you can leave it blank.

Click the Generate button and a token will appear, copy and paste it from the dbt cloud page into the Token field. Then click the Test Connection button on the bottom right.
 After completing the connection test, click the Next button to move on to the repository settings.

A list of repositories such as GitHub will be displayed, so select the repository you use. dbt projects used in dbt cloud are usually saved in GitHub repositories, and can be done by linking with a GitHub account. After configuring the repository, click the Next button to complete the project configuration.
Since there is a Develop tab on the dbt cloud screen , clicking it will load the IDE. Once loaded, click the green initialize your project button on the top left of the screen to create a dbt starter project containing all the core folders and files needed for development.

After initialization is complete, the folders and files required for development in the dbt project will be displayed.
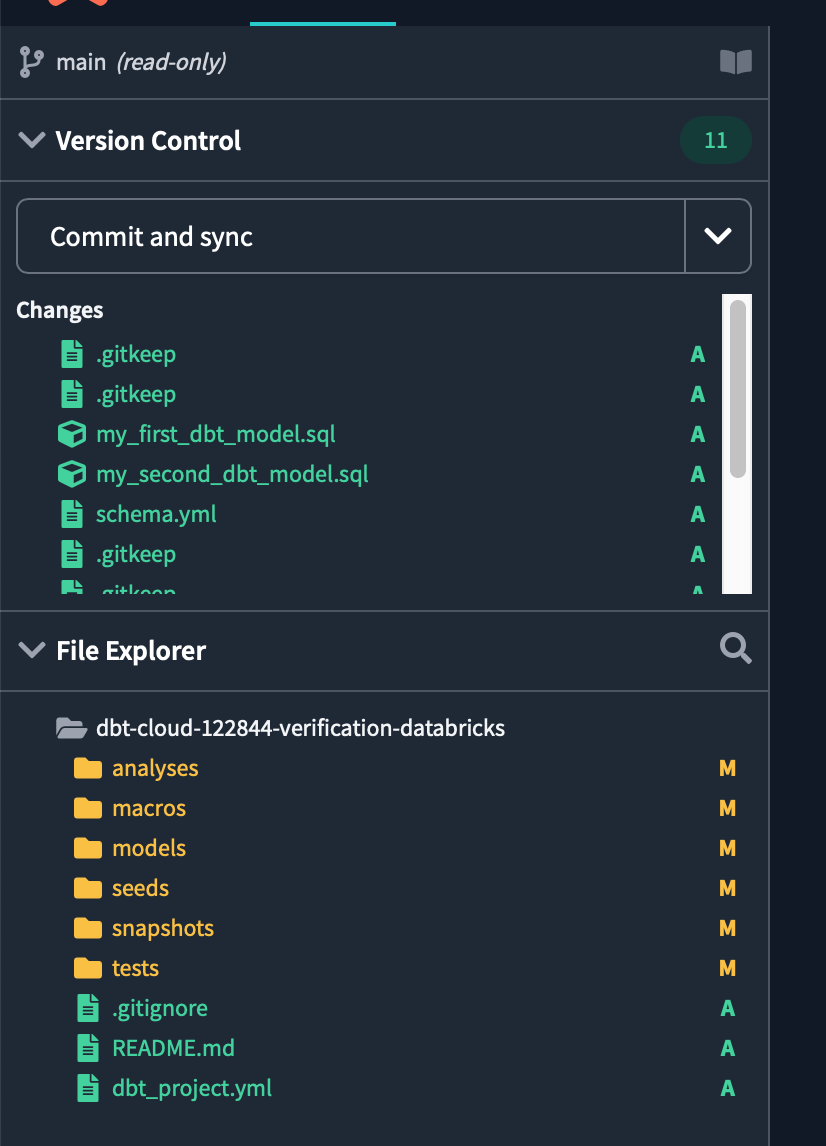
Then click Commit and sync in the top left to make your first commit to the project, including any new files and folders created during initialization.
The commit message can be anything, but type initialize project and commit.

Committing saves your work in the repository you created when you signed up for Partner Connect. Since you didn't branch off, the first commit is on the main branch. In order to separate the production code from the development code, we will later cut off the development branch and do all the work in the development branch.
Prepare your source data
Prepare the source data for use in the dbt project. Since we will be using databricks data this time, prepare the data on the databricks side.
After logging into Databricks, click SQL Editor from the sidebar to go to the SQL Editor UI. Open the New query tab to create a new SQL query using the running SQL warehouse automatically provisioned by Partner Connect.
We will use sample data from DBFS (Databricks File System). After creating a schema to store the sample data, load the sample data and create a Delta Table.
-- サンプルデータを格納するスキーマの作成
CREATE SCHEMA IF NOT EXISTS patient;

-- patientスキーマに対する操作権限を付与
GRANT ALL PRIVILEGES ON SCHEMA patient TO users;

-- 以下、dbfsのデータセットを読み込んでDeltaテーブルを作成する
CREATE TABLE patient.allergies USING csv OPTIONS (path "/databricks-datasets/rwe/ehr/csv/allergies.csv", header "true");

CREATE TABLE patient.careplans USING csv OPTIONS (path "/databricks-datasets/rwe/ehr/csv/careplans.csv", header "true");
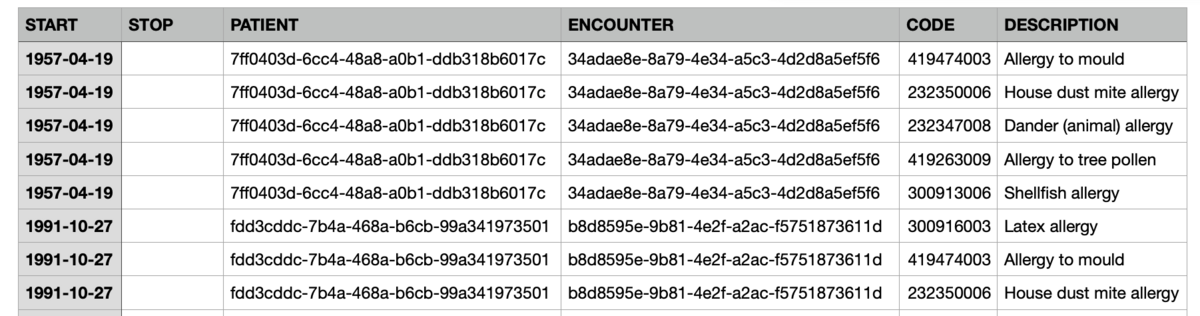
Browse to the table you created.
SELECT * FROM patient.allergies;
SELECT * FROM patient.careplans;

The two sample data used this time have columns with allergy information and treatment plan information for hypothetically created patient data.
Project Structure Setup
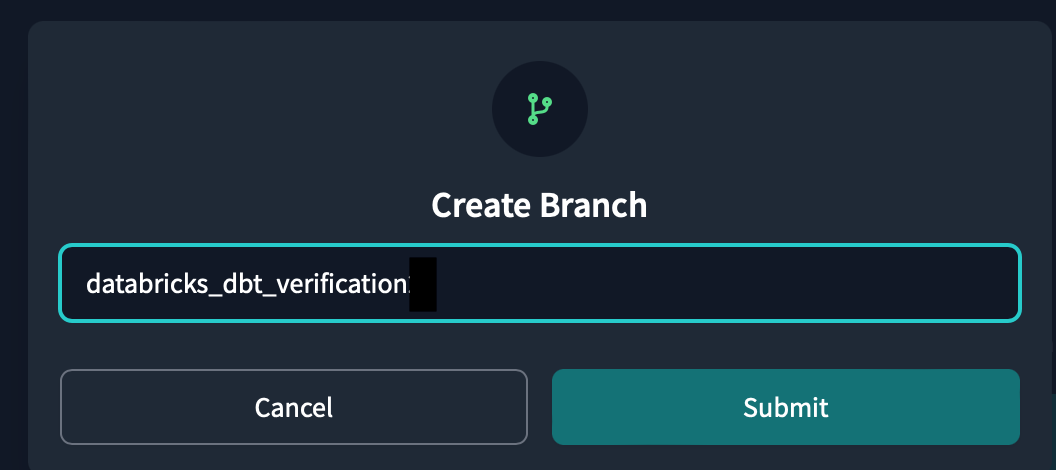
Now go into setting up the dbt project structure. First we need to create a new git branch to work on, so click the Create branch button.
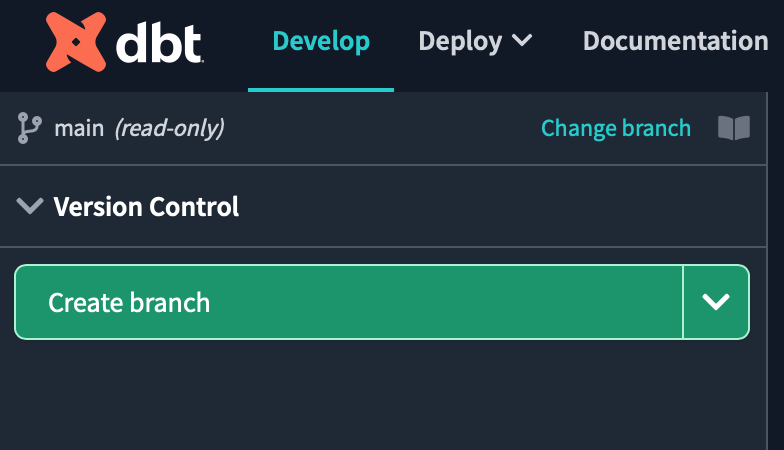
Name the branch databricks_dbt_verification and click submit.
Next, we need to write the project structure definition in the dbt_project.yml file for this project .
This file dbt_project.ymllets you know that "the file you are working on is in the project defined in the file".

dbt_project.yml When you open the template is already prepared.
The description of each tag is written in English, and the Japanese translation is shown below.
# Name your project! Project names should contain only lowercase characters and underscores.
# A good package name should reflect your organization's name or the intended use of these models
# プロジェクトの名前を付ける!プロジェクト名には、小文字とアンダースコアのみを使用すること。
# 良いパッケージ名は、あなたの組織名やこれらのモデルの使用目的を反映したものであるべきです。
name: 'databricks_dbt_verification'
version: '1.0.0'
config-version: 2

# This setting configures which "profile" dbt uses for this project.
# この設定は、dbtがこのプロジェクトでどの「プロファイル」を使用するかを設定します。
profile: 'default'

# These configurations specify where dbt should look for different types of files.
# The `source-paths` config, for example, states that models in this project can be
# found in the "models/" directory. You probably won't need to change these!
# これらの設定は、dbtが様々な種類のファイルを探す場所を指定します。
# 例えば、`source-paths`設定は、このプロジェクトのモデルは以下のようなものであることを示します。
# "models/"ディレクトリにあります。おそらく、これらを変更する必要はないでしょう!

model-paths: ["models"] # モデルとソースを配備するパスを指定
analysis-paths: ["analyses"] # 分析用の SQL を配置するパスを指定
test-paths: ["tests"] # テストコードを配備するバスを指定
seed-paths: ["seeds"] # テスト用のデータであるシードファイルを配備するパスを指定
macro-paths: ["macros"] # マクロを配備するパス
snapshot-paths: ["snapshots"] # スナップショットを配備するパス

target-path: "target"  # dbt コマンドの出力先パス。モデルなどをSQLファイルにコンパイルするためその出力先。
clean-targets:         # dbt clean コマンドを実行したときに削除対象のディレクトリを指定
  - "target"
  - "dbt_packages"

dispatch:
  - macro_namespace: dbt_utils # ディスパッチするマクロの名前空間(パッケージ)。
    search_order: ['spark_utils', 'dbt_utils'] # dbtが探すPackageの順番

# Configuring models
# Full documentation: https://docs.getdbt.com/docs/configuring-models

# In this example config, we tell dbt to build all models in the example/ directory
# as tables. These settings can be overridden in the individual model files
# using the `{{ config(...) }}` macro.
# この設定例では、example/ディレクトリにあるすべてのモデルをテーブルとして構築するようにdbtに指示しています。
# これらの設定は、個々のモデルファイルで上書きすることができます。config(...) }}`マクロを使用します。
models: # モデルの設定
  databricks_dbt_verification:
    # 各フォルダーごとのmaterializeの設定。materializeは、dbtが生成する物理データモデルであり、Data Warehouse上で何を用いて構築するか決めること
    example:
      materialized: view # デフォルトはビューとなります。データの移動が発生しないため高速にモデルを構築できます。
    staging:
      materialized: view
    marts:
      materialized: table # dbt run のたびにデータを入れ直す
Whenever dbt_utils is referenced on a dispatch tag , dbt will first look for the corresponding function in the spark_utils package, and if not found there, it will tell it to look in dbt_utils. This is important to maintain compatibility with Spark SQL across this particular package.
materializedAbout the models tag Defines whether the model to be created from now on will be treated as a view or a table.
There are other types of materializations besides views and tables, so if you are interested, please refer to the dbt official documentation.
dbt_project.yml After changing the file, click the Save button at the top right of the screen to save the changes.
Next, in preparation for development, create a directory for the staging model in the models directory. A staging model is a model used to ingest data from an external data source early in the data pipeline. Its purpose is to take raw data and process it into a clean state. This model also makes it easier to detect bugs in your data pipelines, allowing you to build more flexible and scalable data pipelines.
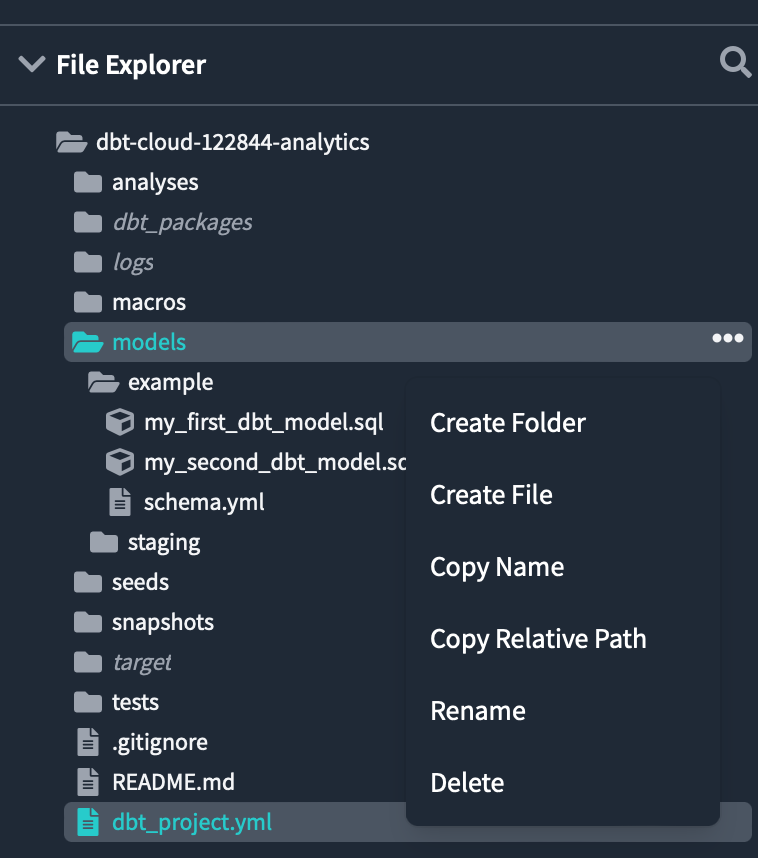
Click the three dots in the models folder and click Create Folder. Enter
the directory name that appears in the popup and click Create .staging
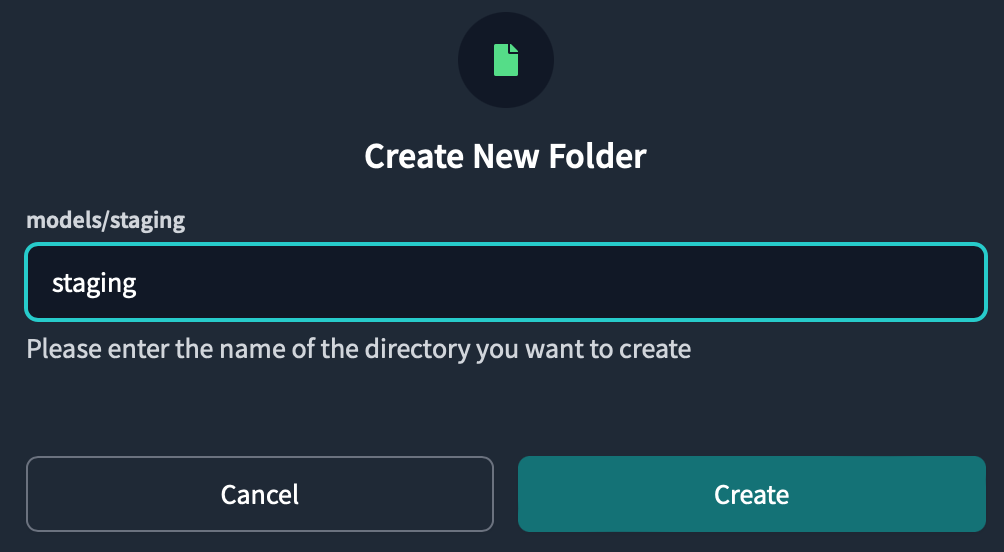
You can see there is a staging folder inside the models directory.
Similarly patients create a folder called inside the staging folder.
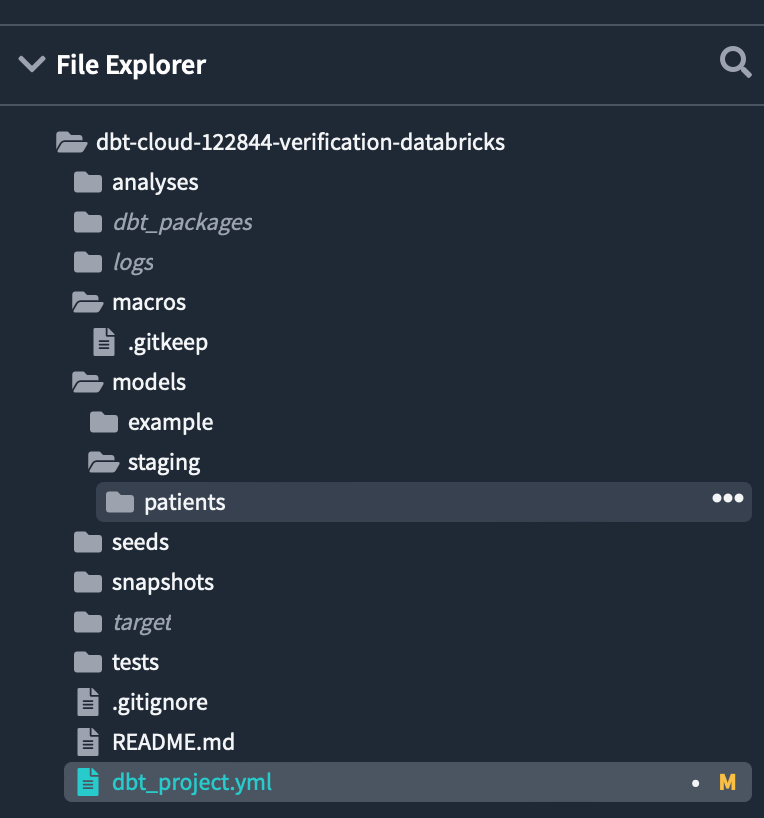
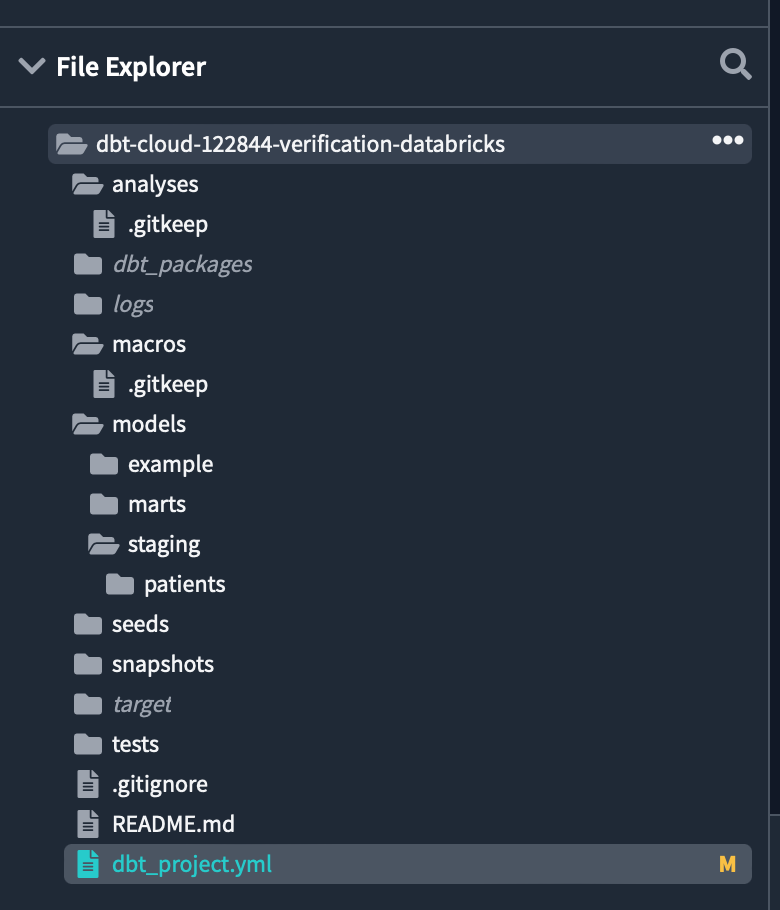
Each folder has been created under the models directory.
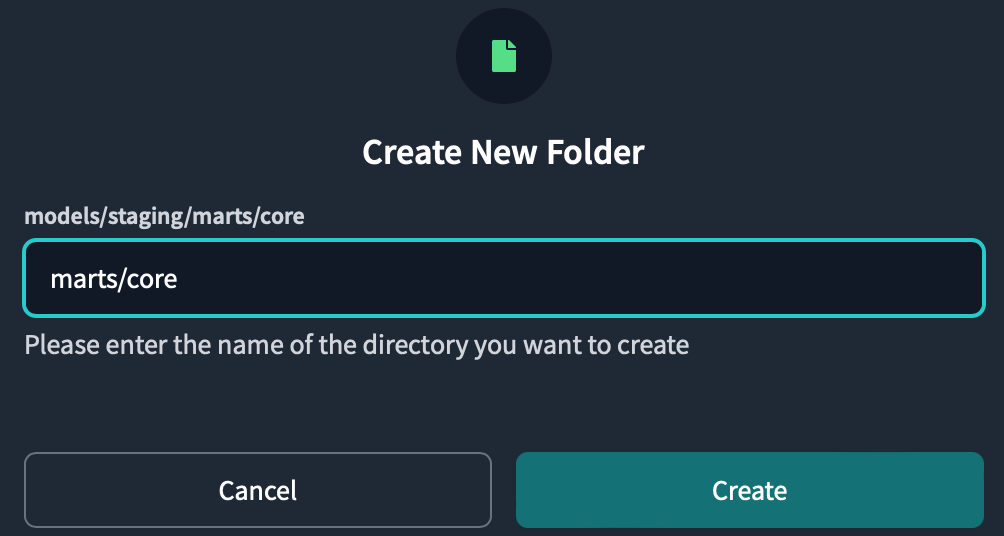
marts/core In addition, create two folders at the same time by typing under the models directory .
The Marts model is used for business analysis and reporting and is equivalent to the Gold Table in Databricks.
The flow of model construction can be summarized as follows.
外部データソース -> staging モデル -> marts モデル -> BI ツール
Then add the package to your project.
packages.yml and write the Package you want to install.
As a rule of the creation place, dbt_project.yml it must be created in the same hierarchy as.
Various packages are available for dbt, which you can check from the following page.
Enter the following code and save
packages:
  - package: dbt-labs/dbt_utils
    version: 1.0.0
  - package: dbt-labs/spark_utils
    version: 0.3.0
dbt_utils contains a library of useful macros, tests, etc. for developing data models.
spark_utils contains a library that simplifies big data processing development by abstracting Spark's API and making it easy to use.
dbt_utils How to install:
dbt_utils
spark_utils How to install:
spark_utils
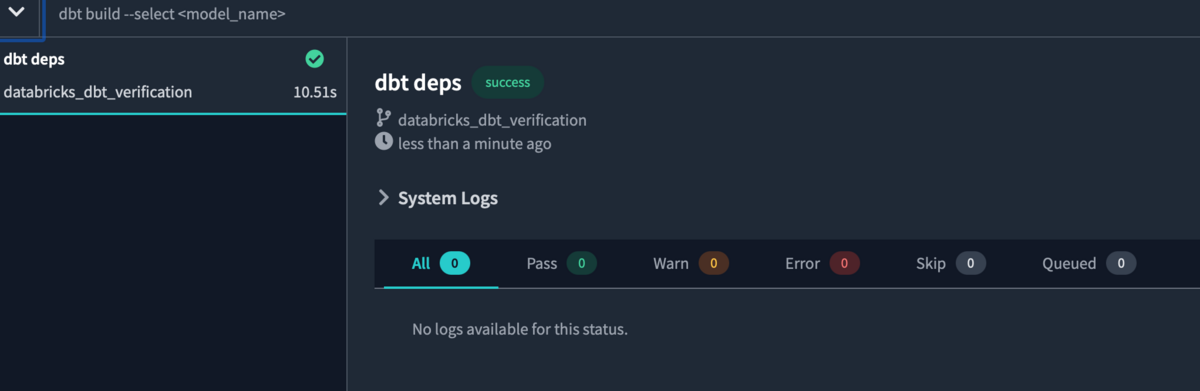
To install the package dbt deps type the command into the console at the bottom of the screen and Enter/Return press .
Package installation is complete.
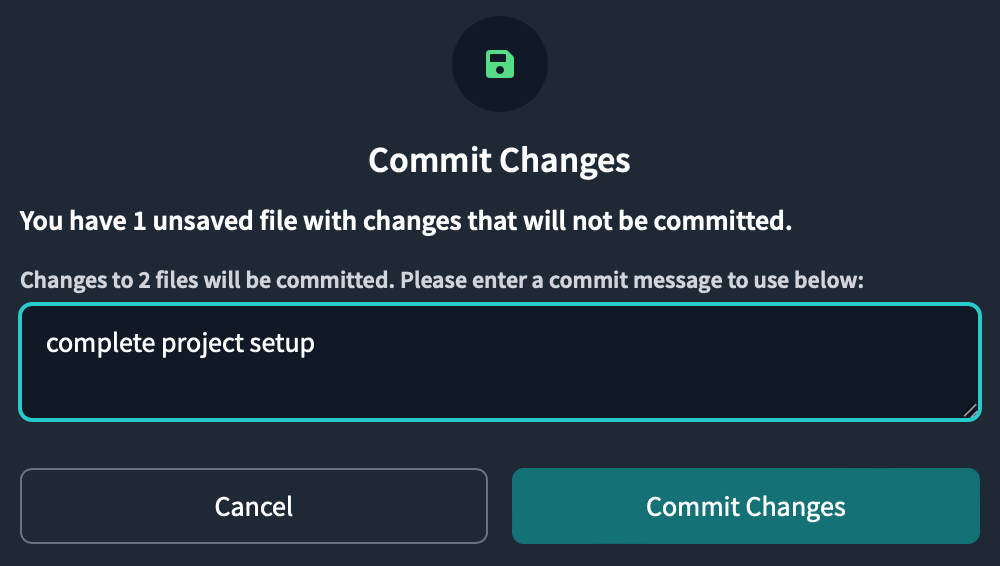
Now that you have set up your project structure, commit your work. Click Commit and sync on the top left of the screen , then click the Commit Changes button to commit.
source declaration
Now create a source file that declares the source data. The source in dbt is the name of the data in the DWH and the declaration of the source, making it possible to test and update the resources that can be referenced from the model.
models/staging/patientspatient_sources.yml Create a new file called inside the folder and write the following code and save it
version: 2

sources:
  - name: patient
    schema: patient
    tables:
      - name: allergies # テーブルの名前
        description: >
          sample data of allergies
        freshness:
          warn_after: # 一定時間(12時間)更新されないと警告が出る
            count: 12
            period: hour
          error_after: # 一定時間(24時間)更新されないとエラーが出る
            count: 24
            period: hour
        columns:
          - name: PATIENT # カラム名を指定し、制約を満たすかどうかテストできる
            tests:
              - not_null # カラムに対する制約

      - name: careplans
        description: >
          sample data of patients's careplans
        freshness:
          warn_after:
            count: 12
            period: hour
          error_after:
            count: 24
            period: hour
        columns:
          - name: PATIENT
            tests:
              - not_null
Lineage appears when you declare the source .

You can check the lineage graph by referring to the documentation.
To do that, dbt docs generate we need to run a command in the console and create a document.
For documentation, click the book icon next to the project name.
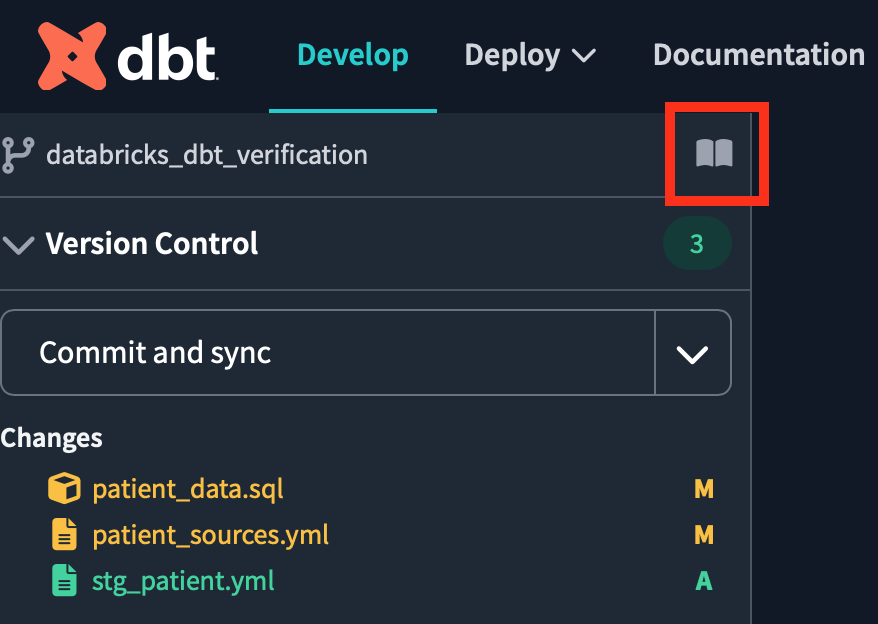
Open dbt Docs and click on the table from the source file to see the table information. By clicking the lineage icon surrounded by a red frame at the bottom right of the screen, you can check the same lineage graph as before.

Create a staging model
Next, set up a staging model to clean up the raw source data to ingest.
A model in dbt is simply a file select of statements . So we can say the following about the model: .sql
- have a one-to-one relationship with the source data
- One model
selectconsists of one sentence. - The file name becomes the model name.
The first staging model will be created from the allergies table.
models/staging/patient Create a new file called in the folder stg_patient_allergies.sql, create the following select statement, and save the file.
with source_data as (
    select *
    from {{ source('patient', 'allergies')}}
)
, renamed_data as (
    select cast(START as date)      as start_date
    , cast(STOP as date)            as stop_date
    , case when PATIENT like '%-%'
            then left(PATIENT, 8)
            else PATIENT
        end                         as patient
    , case when ENCOUNTER like '%-%'
            then left(ENCOUNTER, 8)
            else ENCOUNTER
        end                         as encounter
    , CODE                          as code
    , DESCRIPTION                   as description_allergiess
    from source_data
)
select * from renamed_data
This query loads a table in the schema source with a function . The function allows you to specify the schema and table and load the source data .patientallergies
source
Click the Preview Selection button in the console to view the query results in the IDE. You can also click the Compile Selection button to view the compiled code where the query will run in DWH.
To start building the second staging model, create a new file models/staging/patient in your folder stg_patient_careplans.sql, write the following select statements, and save the file.
with source_data as (
   select *
     from {{ source('patient', 'careplans') }}
)

, renamed_data as (
    select case when Id like '%-%'
        then left(Id, 8)
        else Id
      end                           as id
    , cast(START as date)           as start_date
    , cast(STOP as date)            as stop_date
    , case when PATIENT like '%-%'
        then left(PATIENT, 8)
        else PATIENT
      end                           as patient
    , case when ENCOUNTER like '%-%'
        then left(ENCOUNTER, 8)
        else ENCOUNTER
      end  as encounter
    , CODE                          as code
    , DESCRIPTION                   as description_careplans
    from source_data
)
select * from renamed_data
Finally, create a staging model that summarizes the patient's allergy and treatment plan information.
Create a new file called stg_patient_allergies_careplans.sql in the `models/staging/patient folder, write the following code and save it.
with patient_allergies as (
  select *
    from {{ ref('stg_patient_allergies') }}
)


, patient_careplans as (
  select distinct id
  , start_date
  , patient
  , code
  , description_careplans
    from {{ ref('stg_patient_careplans') }}
)

, patient_allergies_careplans as (
    select patient_careplans.id
    , patient_allergies.start_date
    , patient_allergies.patient
    , patient_allergies.code as allergies_code
    , patient_careplans.code as careplans_code
    , patient_allergies.description_allergiess
    , patient_careplans.description_careplans
    from patient_allergies
    inner join patient_careplans
    on patient_allergies.patient = patient_careplans.patient
)
select * from patient_allergies_careplans
ref('model name')By using the function, you can load the created model.
Here we load the two staging models we created earlier and left join combine them with .
Click the Preview button to see the query results.

Now that the staging model has been created, create the marts model. Create a file
models/marts/core under the directory , write the following code and save it .patient_data.sql
{{
 config(
   materialized = "table",
   tags=["patient"]
 )
}}

with patient_data as (
  select *
    from {{ ref('stg_patient_allergies_careplans') }}
)

, risk_pred_data as (
    select id
    , patient
    , count(distinct allergies_code) as number_of_allergiess
    , count(distinct careplans_code) as number_of_careplans
    from patient_data
    group by 1, 2
    order by  number_of_allergiess desc, number_of_careplans desc
)
select * from risk_pred_data
config Inside the tag materialized, we are treating the model as a table.
tags By tagging the model, it is possible to execute only the model with the specified tag when executing the test.
Preview.
 You can see that the number of allergies and treatment plans are counted for each id and patient.
Check your lineage by clicking the Lineage tab.

You can see that we have created a staging model, a marts model, and a model from the source data to shape the data.
There are still things to do, such as testing and deploying jobs, but since it's become a big deal, I'd like to explain it in the next article.
Reference article
- Reference
- [dbt] I tried using "Package" that makes data model development convenient (dbt_utils)
- Use the source function
- dbt command cheat sheet
- Reference - tags
Conclusion
In this article, Databricks Partner Connect was used to format the data on Databricks on dbt. In the next article, I would like to explain the test and job deployment using the model created this time. I would like to continue to post verification content related to Databricks in the future, so please take a look at it again. We provide a wide range of support, from the introduction of a data analysis platform using Databricks to support for in-house production. If you are interested, please contact us.
We are also looking for people to work with us! We look forward to hearing from anyone who is interested in APC.
Translated by Johann