Introduction
This is Matsuzaki from the lakehouse department of the GLB Business Department. This time, I will explain how to link Fivetran to Databricks. ※Click here for the previous article.
Fivetran allows you to work with a wide variety of data sources using connectors. In this article, we will proceed to create linkage settings from Google Sheets.
table of contents
1. Setting flow
Before we get into the detailed steps, let's briefly review the setup flow. If you would like to read from the individual specific setting method, please refer to "2. Actual linkage procedure".
1-1. Activate Fivetran from Partner Connect
- Enable Fivetran with Parnet Connect feature in Databricks Workspace
- (Automatic execution on Fivetran side) Collection of information necessary for connecting to Fivetran ⇒ Databricks (SQL Endpoint) using Personal Access Token
1-2. Create a Fivetran account
- On the pop-up screen for creating a Fivetran 14-day trial account
- Register your email address and password to create a Fivetran account
- When account creation is completed, transition to the management screen of Fivetran
1-3. Creating a Google Sheets file
- Create a Google Sheets file as a data source
1-4. Create ETL settings
- Implementing Fivetran's connector settings
- Grant permission to access Google Sheets from Fivetran
- Specify the data range to import as a named range
1-5. Operation check of ETL setting
- Confirm that the created ETL configuration works correctly
2. Actual linkage procedure
prerequisite
- A Databricks workspace is a prerequisite.
- Our company’s Mr. Abe explains how to create a workspace in the following article, so please take a look.
- It is assumed that you have not created a Fivetran 14-day trial account. If you have already created a Fivetran account or have a paid Fivetran account, some steps will be different.
2-1. Activate Fivetran from Partner Connect
First, we will proceed with linking with Fivetran using the Partner Connect function of Databricks.
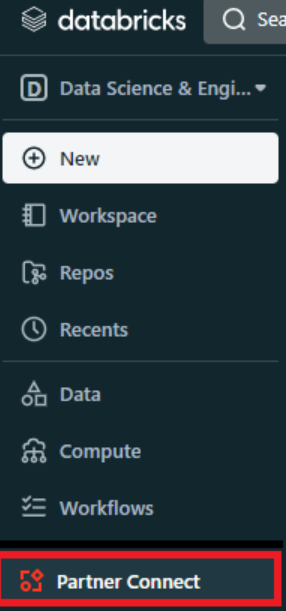
Sign in to Databricks Workspace and click the Partner Connect button on the bottom left of the screen.
On the next Connect selection screen, select Fivetran.

Click Next on the screen after transition. ※This will generate a Personal Access Token and SQL Warehouse instance in the background.

2-2. Creating a Fivetran account
After completing all steps in 3-1, you will be redirected to the Fivetran web page. Initialize a password and create a 14 day trial account.
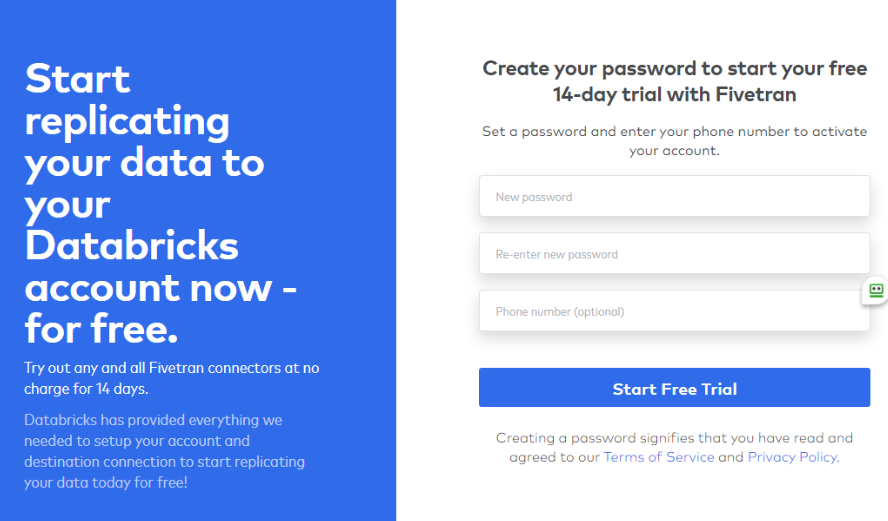
After creating an account, you will be redirected to the Fivetran management screen.

Destinations Click in the sidebar on the left side of the screen and CONNECTED confirm that the connection status to the Databricks workspace is like below.

Creating Google Sheets files
Create a Google Sheets file to import into Fivetran. Create a file in Google Sheet format and enter any data as sample records.
※When I verified, I used the iris-dataset provided on the following page, but the content of the data does not matter here.

Creating ELT settings
Create ELT settings & enter settings
From the Fivetran admin screen, Connectors go to and Add connector click on the top right of the screen.

The screen will change to the connector selection screen, so Google Sheets select the connector.

You will be transferred to the input screen for ELT settings, so proceed with the settings while referring to the Setup Guide displayed on the right side.

The meaning of the setting values is summarized below.
Destination schema : A field to enter the schema name (optional) to store data on Databricks. Here,
google_sheetsspecify the followingDestination table : A field to enter the table name (optional) to store data on Databricks. Here,
google_sheetsspecify the followingAuthentication Method: This is the field that specifies the scope of access rights to open to Fivetran. We want to make only the Google Sheets to be verified accessible from Fivetran, so to
Authorize Service Accountselect here.Sheet URL: A field that specifies the location of the Google Sheets to be operated. Enter the URL of the Google Sheets created earlier.
Creating sharing permissions to Fivetran ⇒ Google Sheets
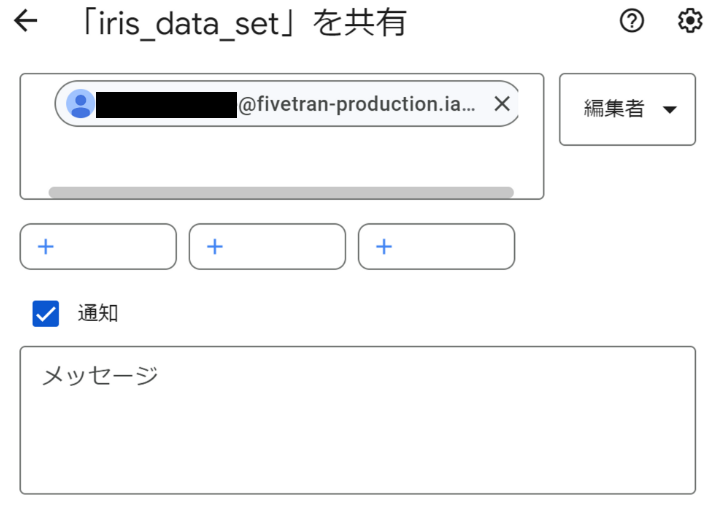
After entering the above setting values, Authorize Service Account if you select , a request to grant sharing settings will be displayed as shown in the image below.
※The specified e-mail address is variable, and a different value is displayed each time it is set.

Go to the Google Sheets operation screen and perform sharing settings for the provided email address.
Setting Named Ranges
Follow the Setup Guide on the right side of the screen to set the named range of Google Sheets(namaed range). By specifying a named range, FIvetran will import only the data within the specified range.
First, select the data you want to add to Fivetran as shown below.
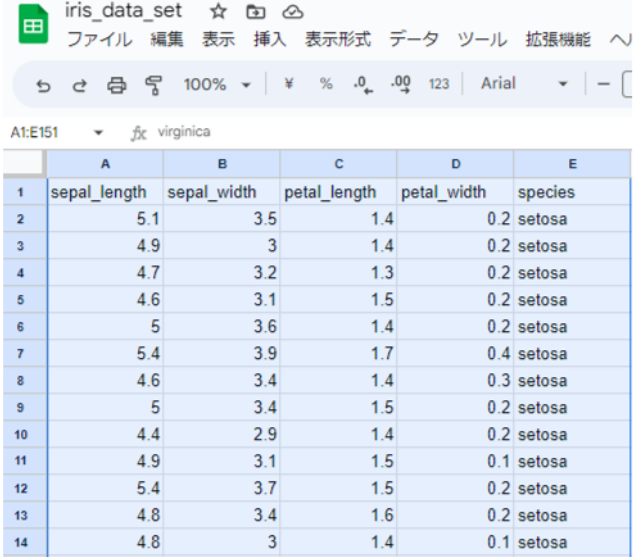
Next, select data⇒ .namedRange

Enter any name and click Click.

Return to the Fivetran settings screen, Find sheet click , Named Range select the named range you just created from the pull-down menu, and click Save & Test.

The screen will change to the connection test screen. After confirming that the connection test of the two items has succeeded and All connection tests passed!! is displayed, Continue select and click.

2-5. Operation check of ETL settings
You will be returned to the Fivetran screen, so click Start Sync to start importing data from your data source.
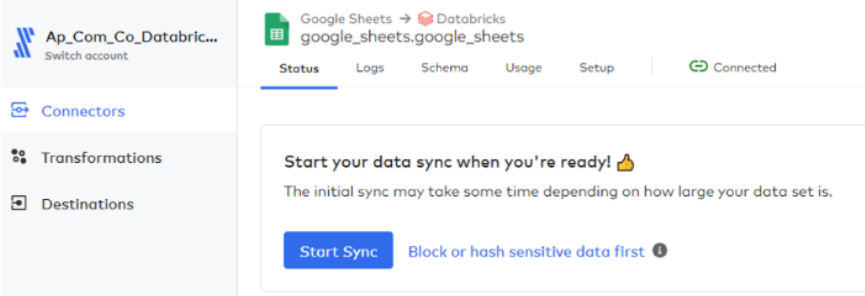
You can confirm that Sync has started on the screen after the transition.

After a while, Sync is completed and the display changes to the following.

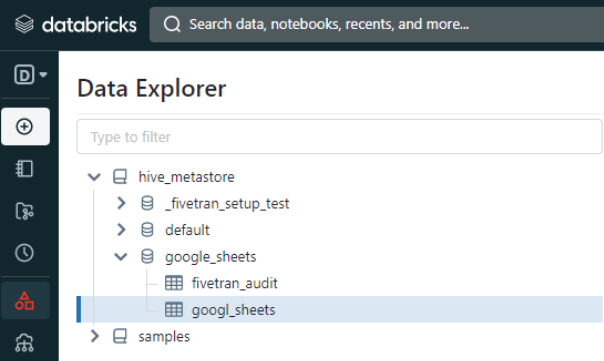
If you check the Databricks Data Explorer screen, you can confirm that the specified schema and table have been created.
Conclusion
That's all for this article. How was it? We hope that you can see how easy it is to create an ELT configuration using Fivetran.
We provide a wide range of support, from the introduction of a data analysis platform using Databricks to support for in-house production. If you are interested, please contact us.
We are also looking for people to work with us! We look forward to hearing from anyone who is interested in APC.
Translated by Johann
