
こちらはエーピーコミュニケーションズ Advent Calender 2022の15日目の記事です。
はじめに

こんにちは、ACS事業部の過部です。
この記事では、Node.jsアプリを題材にAzure PipelinesとApp Serviceを用いたCI/CD環境の構築手順をご紹介します。
パイプライン構築後は、実際にアプリケーションコードに変更を加えて自動デプロイを試していきます。
前提条件
- 各種作業でAzure CLIインストール済みのLinuxターミナルを利用します
- リポジトリにはAzure Reposを利用します
- Service PrincipalにContributor権限を付与できるAzureアカウントが必要です
- Azure DevOpsプロジェクトが既に存在すること
- Azure Reposリポジトリが既に存在すること
- 利用可能なMicrosoft-hosted agentが存在すること
準備編
まずはパイプライン作成に必要な要素を準備します。
以下の流れで作業を行います。
- 手順① サンプルアプリを用意
- 手順② 各種Azureリソースを作成
- 手順③ Service Principalを作成
準備編:手順① サンプルアプリを用意
Microsoftが公開しているNode.jsのサンプルアプリをAzure Reposリポジトリにクローンしていきます。 サンプルアプリはトップページにHello Worldを表示する簡単なものです。
以下の作業をターミナル上で実施します。
# サンプルアプリをgit clone
git clone https://github.com/Azure-Samples/nodejs-docs-hello-world.git

# リモートリポジトリを自身のAzure Reposリポジトリに変更
cd nodejs-docs-hello-world
git remote remove origin
git remote add origin https://sample-organization@dev.azure.com/sample-organization/sample-project/_git/sample-repository

# git pushを実施
git push origin main
※ 注:Azure ReposリポジトリのURLは自身のものに置き換えて実行してください。
準備編:手順② 各種Azureリソースを作成
Azure CLIを用いてアプリケーションのデプロイ先となるApp Serviceを作成していきます。
以下の作業をターミナル上で実施します。
# 変数設定
webName="app-sample"
rgName='rg-sample'
planName='plan-sample'

# Resource Groupを作成
az group create --name $rgName -l japaneast

# App Service Planを作成
az appservice plan create \
  --name $planName \
  --resource-group $rgName \
  --sku B1 \
  --is-linux

# App Serviceを作成
az webapp create \
  --name $webName \
  --resource-group $rgName \
  --plan $planName \
  --runtime "node|16-lts"
準備編:手順③ Service Principalを作成
App Serviceへのデプロイ時にAzure Pipelinesが使うService Principalを作成していきます。詳細は後述します。
以下の作業をターミナル上で実施します。
# Resource GroupレベルのContributor権限を持つService Principalを作成
az ad sp create-for-rbac --name sp-sample --role Contributor --scopes $(az group show -g $rgName --query id -o tsv)
以下の様な内容が出力されます。後手順で利用するため無くさないように控えておきます。
{
  "appId": "xxxxxxx",
  "displayName": "sp-sample",
  "password": "xxxxxxx",
  "tenant": "xxxxxxx-xxxxxxx-xxxxxxx-xxxxxxx"
}
構築編
次に、CI/CDパイプラインを作成していきます。
以下の流れで作業を行います。
- 手順④ Service Connectionを作成
- 手順⑤ パイプラインを作成
構築編:手順④ Service Connectionを作成
Azure PipelinesからAzure Resource Managerにアクセスするために必要なService Connectionと呼ばれる設定を作成していきます。 本題に入る前に簡単にService Connectionについて解説します。
Service Connectionとは
一言でいうと、Azure Pipelinesから外部サービスに接続するために必要な設定です。
今回構築するCI/CDパイプラインでは、App Serviceへのデプロイを行うためにAzure PipelinesからAzure Resource Managerに接続する必要があります。その際にService Connectionが必要になります。
また、Service Connection作成時には外部サービスへアクセスするための認証情報を設定する必要があります。Azure Resource Managerへ接続する際の認証情報にはService Principal, Managed Identity等が利用できますが、今回はService Principalを利用します。
Service Connection作成画面へ移動
Azure DevOps上でService Connectionを作成していきます。

Azure DevOpsのプロジェクトトップ画面から、Project settings -> Service connections -> New service connectionをクリックします。
接続タイプを選択

Azure Resource Managerを選択し、右下のNextをクリックします。
認証方式を選択

Service Principal(manual)を選択し、右下のNextをクリックします。
Service Principal(automatic)を選択した場合、現在Azure PipelinesにログインしているアカウントがAzure Resource Manager接続用の認証情報としてそのまま利用されます。 セキュリティ及びアクセス制限の観点からAzure Pipelinesへのログインに使用するアカウントとApp Serviceへのデプロイに使用するアカウントは分離するのが望ましいです。 今回はService Principal(manual)を選択し、準備編で作成したService Principalを認証情報として利用します。
各種パラメーターを入力

準備編で作成したService Principalの資格情報や、Azure Portal上の情報を基に各項目を埋めて、左下のVerifyをクリックします。
※ Service Principal資格情報のappIdは上記のService Principal Id、Service Principal資格情報のpasswordは上記のService principal keyに該当します。

問題無ければ、Service Connection名を入力し、右下のVerify and Saveをクリックします。
構築編:手順⑤ パイプラインを作成
Azure DevOps上でパイプラインを作成していきます。
パイプライン作成画面へ移動

Azure DevOpsのプロジェクトトップ画面から、Pipelines -> New Pipeline をクリックします。
リポジトリ種類を選択

Azure Repos Git をクリックします。
対象リポジトリを選択

作成済みのリポジトリ をクリックします。
パイプラインを設定
リポジトリ内容と関連するテンプレートが表示されます。
今回は、Node.jsテンプレートをカスタマイズする形でYAMLファイルを書いていきます。

Node.js をクリックします。
YAMLファイルを変更
以下の様に変更します。
※ 注:variablesのazureSubscriptionの値は、前手順で自身が設定したService Connection名に置き換えてください。
# トリガー条件:mainブランチへのgit push
trigger:
- main

# 実行環境のVMイメージ:最新版Ubuntu
pool:
  vmImage: ubuntu-latest

# 変数設定
variables:
  # Service Connection名
  azureSubscription: 'sc-sample'

  # App Service名
  webAppName: 'app-sample'

# パイプライン内で実行される具体的な処理
stages:
- stage: Build
  displayName: Build stage # Azure DevOps上での表示名を指定
  jobs:
  - job: Build
    displayName: Build
    steps:
    # Node.jsインストール用Task
    # https://learn.microsoft.com/ja-jp/azure/devops/pipelines/tasks/reference/node-tool-v0?view=azure-pipelines
    - task: NodeTool@0
      inputs:
        versionSpec: '16.x'
      displayName: 'Install Node.js'

    # スクリプト実行用Taskの省略形
    # https://learn.microsoft.com/ja-jp/azure/devops/pipelines/tasks/reference/cmd-line-v2?view=azure-pipelines&viewFallbackFrom=azure-devops
    - script: |
        npm install
        npm run build --if-present
      displayName: 'npm install and build'

    # アーカイブ用Task
    # https://learn.microsoft.com/ja-jp/azure/devops/pipelines/tasks/reference/archive-files-v2?view=azure-pipelines
    - task: ArchiveFiles@2
      displayName: 'Archive files'
      inputs:
        rootFolderOrFile: '$(System.DefaultWorkingDirectory)'
        includeRootFolder: false
        archiveType: zip
        archiveFile: $(Build.ArtifactStagingDirectory)/$(Build.BuildId).zip
        replaceExistingArchive: true

    # Azure Pipelinesでは実行環境がjob単位で共有されます。そのためDeployステージからBuildステージの成果物へ直接アクセスできません。
    # 今回の例では、ビルド成果物のPublish及びDownloadを行うことでデプロイに必要な成果物をステージ間で受け渡しています。

    # ビルド成果物公開用Task
    # https://learn.microsoft.com/ja-jp/azure/devops/pipelines/tasks/reference/publish-build-artifacts-v1?view=azure-pipelines
    - task: PublishPipelineArtifact@1
      displayName: 'Publish npm artifact'
      inputs:
        targetPath: '$(Build.ArtifactStagingDirectory)/$(Build.BuildId).zip'
        artifactName: npm

- stage: Deploy
  displayName: Deploy stage
  dependsOn: Build # Buildステージ完了時のみDeployステージを実行
  condition: succeeded()
  jobs:
  - job: Deploy
    displayName: Deploy
    steps:
    # ビルド成果物ダウンロード用Task
    # https://learn.microsoft.com/ja-jp/azure/devops/pipelines/tasks/reference/download-package-v1?view=azure-pipelines
    - task: DownloadBuildArtifacts@1
      displayName: "Download npm artifact"
      inputs:
        artifactName: npm
        downloadPath: $(System.ArtifactsDirectory)

    # App Serviceデプロイ用Task
    # https://learn.microsoft.com/ja-jp/azure/devops/pipelines/tasks/reference/azure-web-app-v1?view=azure-pipelines
    - task: AzureWebApp@1
      displayName: 'Azure Web App Deploy'
      inputs:
        azureSubscription: $(azureSubscription)
        appType: webAppLinux
        appName: $(webAppName)
        runtimeStack: 'NODE|16-lts'
        package: $(System.ArtifactsDirectory)/$(Build.BuildId).zip
        startUpCommand: 'npm run start'
YAMLファイルを保存及び実行

YAMLファイルを編集後、Save and run をクリックします。

コミットメッセージ確認画面が表示されるので、再度Save and run をクリックします。
パイプラインの実行結果を確認

パイプラインの実行完了を暫く待ちます。
Build, Deployステージ共にステータスが緑色であることを確認します。
App Serviceへアクセス

パイプラインの正常完了が確認できたので、App Serviceへ正常デプロイできたか確認していきます。
Azure Portal等からApp ServiceのURLを入手しアクセスします。
トップページにHello World!と表示されていればデプロイ成功です。
動作確認編
CI/CDパイプラインの動作確認を行っていきます。
以下の流れで作業を行います。
- 手順⑥ アプリケーションコードを変更
- 手順⑦ パイプラインの実行結果をを確認
- 手順⑧ App Service上で変更内容を確認
動作確認編:手順⑥ アプリケーションコードを変更
トップページに表示される文字列を変更していきます。
index.jsの中身を書き換え
index.jsの58行目のHello World!を任意の文字列に書き換えます。
app.get('/', function (req, res) {
    return res.send("Hello World!"); # 変更対象
})

# 書き換え例
app.get('/', function (req, res) {
    return res.send("Hello APC!");
})
リモートリポジトリへgit push
変更後、commitしてpushします。
# git commit
git commit -a -m"トップページを変更"

# git push
git push origin main
動作確認編:手順⑦ パイプラインの実行結果を確認
mainブランチへのgit pushを実行したためパイプラインがトリガーされているはずです。 Azure DevOpsへ移動し実行結果を確認していきます。
対象パイプラインへ移動

Pipelines -> (作成したパイプライン) をクリックします。
対象実行結果へ移動

(最新の実行結果) をクリックします。
パイプラインの実行結果を確認
パイプラインの実行完了を暫く待ちます。
Build, Deployステージ共にステータスが緑色であることを確認します。
動作確認編:手順③ App Service上で変更内容を確認
パイプラインの正常完了が確認できたので、App Serviceへ変更内容が反映されたか確認していきます。
ブラウザを更新
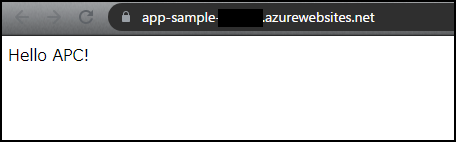
トップページに変更内容が反映されていれば作業は完了です。
おわりに
私達ACS事業部はAzure・AKSを活用した内製化のご支援をしております。ご相談等ありましたらぜひご連絡ください。
また、一緒に働いていただける仲間も募集中です!
切磋琢磨しながらスキルを向上できる、エンジニアには良い環境だと思います。ご興味を持っていただけたら嬉しく思います。