こんにちは、クラウド事業部 CI/CDサービスメニューチームの西野です。
Spring BootでHello Worldを表示するアプリケーションをGitLabのCI機能を使ってビルドする方法を紹介します。
GitLabのCI機能がどのように動くのか、シンプルなアプリケーションで一度試したい方は参考にしてください。
本記事はアプリケーションをビルドし、成果物がローカルで動くことを確認するまでの手順を記載しています。
アプリケーションの作成は以下の記事を参考にしています。
目次
前提
- 作業端末はWindows 10
- GitLab環境はSaaS版のGitLab(Ultimate版)を使用
- 開発ツールはVisual Studio Codeを使用
事前準備
SpringBootアプリケーションを開発するための事前準備をします。
- Visual Studio Code(以下VS Code)をインストールする
- 以下のVS Code拡張機能をインストールする
- Open JDKをインストールする※本検証ではOpen JDK 17をインストール
- Archived OpenJDK GA Releasesから17.0.2をダウンロードする
- ダウンロードしたopenjdk-17.0.2_windows-x64_bin.zipをC:\Users\user_nameに展開する
- 作業端末にシステム環境変数を設定する
- システム環境変数に
JAVA_HOMEを追加しC:\Users\user_name\jdk-17.0.2を設定する - 既存のシステム環境変数
PathにC:\Users\user_name\jdk-17.0.2\binを追加する
Spring Bootアプリケーションの作成
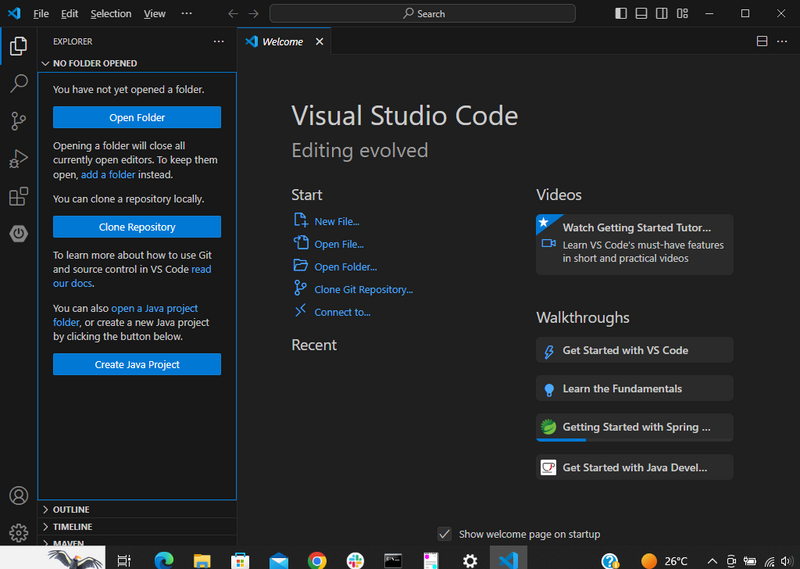
Create Java Projectボタンを押下する
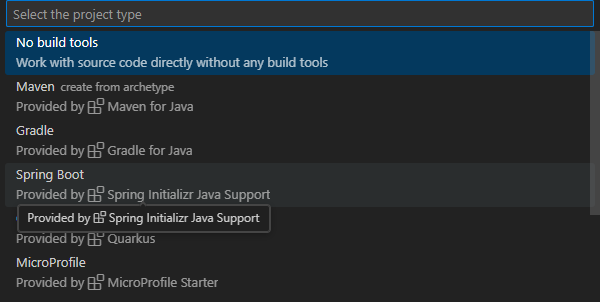
プロジェクトタイプはSpring Bootを選択する
プロジェクトタイプはMaven Projectを指定する
Spring Bootのバージョンを選択する
使用言語はJavaを選択する
グループIDを指定する
アーティファクトIDを指定する
パッケージングタイプはJarを選択する
Javaバージョンは17を選択する
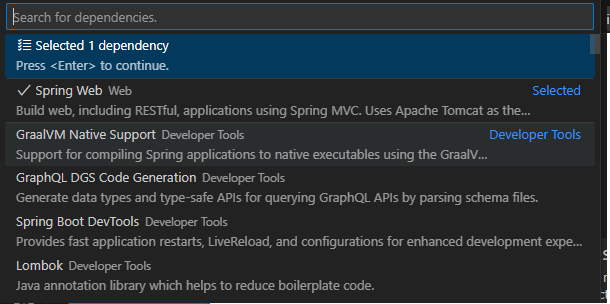
依存ライブラリ「Spring Web Web」を選択する
src\main\java\com\example\helloworld\にコントローラークラスのjavaファイルHelloworldApplicationController.javaを追加package com.example.helloworld; import org.springframework.web.bind.annotation.RequestMapping; import org.springframework.web.bind.annotation.RestController; @RestController public class HelloworldApplicationController { @RequestMapping("/") public String test() { return "Hello World"; } }
GitLabでビルドするための準備
この時点でローカルでのビルドは可能ですが、GitLabで自動ビルドできる状態にするには、
.gitlab-ci.ymlとci_settings.xmlの作成、pom.xmlファイルの修正が必要です。
追加ファイルはプロジェクトのルートディレクトリに配置してください。
.gitlab-ci.ymlを作成する
- lib/gitlab/ci/templates/Maven.gitlab-ci.yml · master · GitLab.org / GitLab · GitLabで公開されているMavenビルド用のテンプレートを使用
- 以下のJDKのバージョンを修正
image: maven:3-openjdk-8->image: maven:3-openjdk-17verify:jdk8:->verify:jdk17:deploy:jdk8:->deploy:jdk17:
.gitlab-ci.yml
 # To contribute improvements to CI/CD templates, please follow the Development guide at:
 # https://docs.gitlab.com/ee/development/cicd/templates.html
 # This specific template is located at:
 # https://gitlab.com/gitlab-org/gitlab/-/blob/master/lib/gitlab/ci/templates/Maven.gitlab-ci.yml

 # Build JAVA applications using Apache Maven (http://maven.apache.org)
 # For docker image tags see https://hub.docker.com/_/maven/
 #
 # For general lifecycle information see https://maven.apache.org/guides/introduction/introduction-to-the-lifecycle.html

 # This template will build and test your projects
 # * Caches downloaded dependencies and plugins between invocation.
 # * Verify but don't deploy merge requests.
 # * Deploy built artifacts from master branch only.

 variables:
   # `showDateTime` will show the passed time in milliseconds. You need to specify `--batch-mode` to make this work.
   MAVEN_OPTS: >-
     -Dhttps.protocols=TLSv1.2
     -Dmaven.repo.local=$CI_PROJECT_DIR/.m2/repository
     -Dorg.slf4j.simpleLogger.showDateTime=true
     -Djava.awt.headless=true

   # As of Maven 3.3.0 instead of this you MAY define these options in `.mvn/maven.config` so the same config is used
   # when running from the command line.
   # As of Maven 3.6.1, the use of `--no-tranfer-progress` (or `-ntp`) suppresses download and upload messages. The use
   # of the `Slf4jMavenTransferListener` is no longer necessary.
   # `installAtEnd` and `deployAtEnd` are only effective with recent version of the corresponding plugins.
   MAVEN_CLI_OPTS: >-
     --batch-mode
     --errors
     --fail-at-end
     --show-version
     --no-transfer-progress
     -DinstallAtEnd=true
     -DdeployAtEnd=true

 # This template uses the latest Maven 3 release, e.g., 3.8.6, and OpenJDK 17 (LTS)
 # for verifying and deploying images
 # Maven 3.8.x REQUIRES HTTPS repositories.
 # See https://maven.apache.org/docs/3.8.1/release-notes.html#how-to-fix-when-i-get-a-http-repository-blocked for more.
 image: maven:3-openjdk-17

 # Cache downloaded dependencies and plugins between builds.
 # To keep cache across branches add 'key: "$CI_JOB_NAME"'
 # Be aware that `mvn deploy` will install the built jar into this repository. If you notice your cache size
 # increasing, consider adding `-Dmaven.install.skip=true` to `MAVEN_OPTS` or in `.mvn/maven.config`
 cache:
   paths:
     - .m2/repository

 # For merge requests do not `deploy` but only run `verify`.
 # See https://maven.apache.org/guides/introduction/introduction-to-the-lifecycle.html
 .verify:
   stage: test
   script:
     - 'mvn $MAVEN_CLI_OPTS verify'
   except:
     variables:
       - $CI_COMMIT_BRANCH == $CI_DEFAULT_BRANCH

 # Verify merge requests using JDK17
 verify:jdk17:
   extends:
     - .verify

 # To deploy packages from CI, create a `ci_settings.xml` file
 # For deploying packages to GitLab's Maven Repository: See https://docs.gitlab.com/ee/user/packages/maven_repository/index.html#create-maven-packages-with-gitlab-cicd for more details.
 # Please note: The GitLab Maven Repository is currently only available in GitLab Premium / Ultimate.
 # For `master` or `main` branch run `mvn deploy` automatically.
 deploy:jdk17:
   stage: deploy
   script:
     - if [ ! -f ci_settings.xml ]; then
         echo "CI settings missing\! If deploying to GitLab Maven Repository, please see https://docs.gitlab.com/ee/user/packages/maven_repository/index.html#create-maven-packages-with-gitlab-cicd for instructions.";
       fi
     - 'mvn $MAVEN_CLI_OPTS deploy --settings ci_settings.xml'
   only:
     variables:
       - $CI_COMMIT_BRANCH == $CI_DEFAULT_BRANCH
ci_settings.xmlを作成する
- Maven packages in the package registry | GitLabの2を参考に作成する
- 上記のページのサンプルをコピーし、
<id>gitlab-maven</id>を<id>helloworld</id>に置換する
- 上記のページのサンプルをコピーし、
ci_settings.xml
<settings xmlns="http://maven.apache.org/SETTINGS/1.1.0" xmlns:xsi="http://www.w3.org/2001/XMLSchema-instance" xsi:schemaLocation="http://maven.apache.org/SETTINGS/1.1.0 http://maven.apache.org/xsd/settings-1.1.0.xsd"> <servers> <server> <id>helloworld</id> <configuration> <httpHeaders> <property> <name>Job-Token</name> <value>${CI_JOB_TOKEN}</value> </property> </httpHeaders> </configuration> </server> </servers> </settings>- Maven packages in the package registry | GitLabの2を参考に作成する
pom.xmlを修正する
- Maven packages in the package registry | GitLabの3を参考に既存のpom.xmlに追記する
- 上記のページのサンプルをコピーし、
<id>gitlab-maven</id>を<id>helloworld</id>に置換し追記する
- 上記のページのサンプルをコピーし、
pom.xml
<?xml version="1.0" encoding="UTF-8"?> <project xmlns="http://maven.apache.org/POM/4.0.0" xmlns:xsi="http://www.w3.org/2001/XMLSchema-instance" xsi:schemaLocation="http://maven.apache.org/POM/4.0.0 https://maven.apache.org/xsd/maven-4.0.0.xsd"> <modelVersion>4.0.0</modelVersion> <parent> <groupId>org.springframework.boot</groupId> <artifactId>spring-boot-starter-parent</artifactId> <version>3.2.5</version> <relativePath/> <!-- lookup parent from repository --> </parent> <groupId>com.example</groupId> <artifactId>helloworld</artifactId> <version>0.0.1-SNAPSHOT</version> <name>helloworld</name> <description>Demo project for Spring Boot</description> <properties> <java.version>17</java.version> </properties> <dependencies> <dependency> <groupId>org.springframework.boot</groupId> <artifactId>spring-boot-starter-web</artifactId> </dependency> <dependency> <groupId>org.springframework.boot</groupId> <artifactId>spring-boot-starter-test</artifactId> <scope>test</scope> </dependency> </dependencies> <build> <plugins> <plugin> <groupId>org.springframework.boot</groupId> <artifactId>spring-boot-maven-plugin</artifactId> </plugin> </plugins> </build> <repositories> <repository> <id>helloworld</id> <url>${CI_API_V4_URL}/projects/${CI_PROJECT_ID}/packages/maven</url> </repository> </repositories> <distributionManagement> <repository> <id>helloworld</id> <url>${CI_API_V4_URL}/projects/${CI_PROJECT_ID}/packages/maven</url> </repository> <snapshotRepository> <id>helloworld</id> <url>${CI_API_V4_URL}/projects/${CI_PROJECT_ID}/packages/maven</url> </snapshotRepository> </distributionManagement> </project>- Maven packages in the package registry | GitLabの3を参考に既存のpom.xmlに追記する
.gitlab-ci.ymlの解読
.gitlab-ci.ymlはビルドジョブの定義ファイルです。
今回使用するテンプレートの内容を解読してみようと思います。
以下の3つの設定はジョブ全体に適用される設定です。
variables:: ビルドで使用する変数を定義しているcache:: ジョブ間でキャッシュするファイルやディレクトリのリストを指定するimage: ジョブが実行されるDockerイメージを指定する
次のセクションではテストの実行が定義されています。
マージリクエストが作成された場合に実行されるようにexceptセクションで制御しています。
.verify:
  stage: test
  script:
    - 'mvn $MAVEN_CLI_OPTS verify'
  except:
    variables:
      - $CI_COMMIT_BRANCH == $CI_DEFAULT_BRANCH
次の定義はextendsセクションで上記の.verifyを関数のように呼び出しています。
verify:jdk17:
  extends:
    - .verify
最後に、デプロイの実行が定義されています。
mainブランチが更新された場合のみ動くようにonlyセクションで制御されています。
また、ci_settings.xmlが存在しない場合はデプロイは実行されずにジョブが異常終了します。
deploy:jdk17:
  stage: deploy
  script:
    - if [ ! -f ci_settings.xml ]; then
        echo "CI settings missing\! If deploying to GitLab Maven Repository, please see https://docs.gitlab.com/ee/user/packages/maven_repository/index.html#create-maven-packages-with-gitlab-cicd for instructions.";
      fi
    - 'mvn $MAVEN_CLI_OPTS deploy --settings ci_settings.xml'
  only:
    variables:
      - $CI_COMMIT_BRANCH == $CI_DEFAULT_BRANCH
ビルドジョブの実行・成果物の確認
前章で確認した通り、マージリクエストの作成とmainブランチの更新で動くジョブが異なるので、
2つのジョブの動きを確認します。
マージリクエストの作成
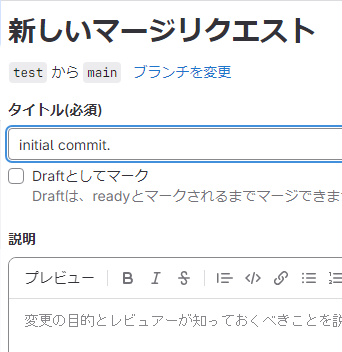
- testブランチを作成し、新しいマージリクエストを作成する
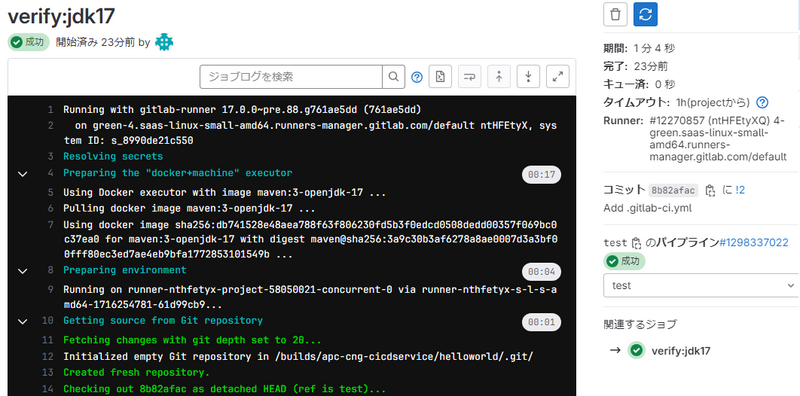
- 左メニュー「ビルド -> ジョブ」押下し、verify:jdk17ジョブが成功していることを確認する

- ジョブ列のリンクを押下し、ジョブのログを確認する
mainブランチの更新
- testブランチのマージリクエストをマージする
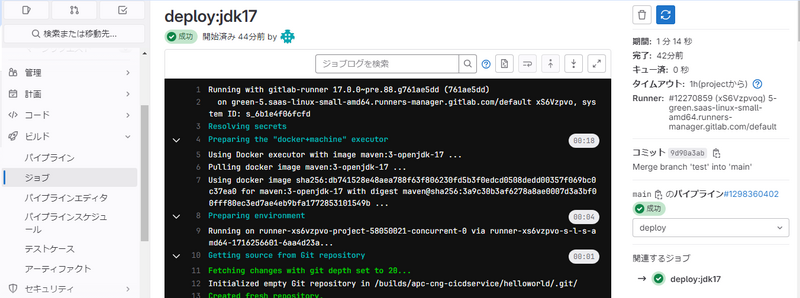
- 左メニュー「ビルド -> ジョブ」を押下し、deploy:jdk17ジョブが成功していることを確認する

- ジョブ列のリンクを押下し、ジョブのログを確認する
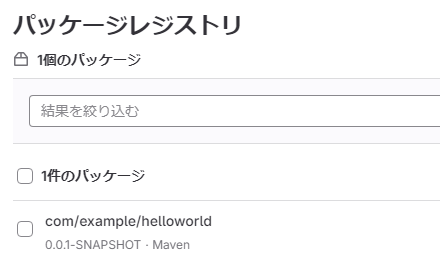
- 左メニュー「デプロイ -> パッケージレジストリ」を押下し、パッケージ「com/example/helloworld」ができていることを確認する
- 「com/example/helloworld」のリンク先「アセット」の「helloworld-0.0.1-xxxx.jar」を押下しダウンロードする

- ダウンロードしたjarファイルを以下のコマンドでローカルで実行する
java -jar helloworld-0.0.1-xxxx.jar
- ブラウザからhttp://localhost:8080にアクセスし、「Hello World」と表示されることを確認する
さいごに
今回はSpring Bootアプリケーションをビルドし、成果物を確認するところまでの手順を紹介しました。
GitLabが公開しているテンプレートを使用すれば、GitLabでCI環境を簡単に構築できることがわかりました。
最後に、弊社はGitLabオープンパートナー認定を受けております。 また以下のようにCI/CDの導入を支援するサービスも行っているので、何かご相談したいことがあればお気軽にご連絡ください。
